Walls

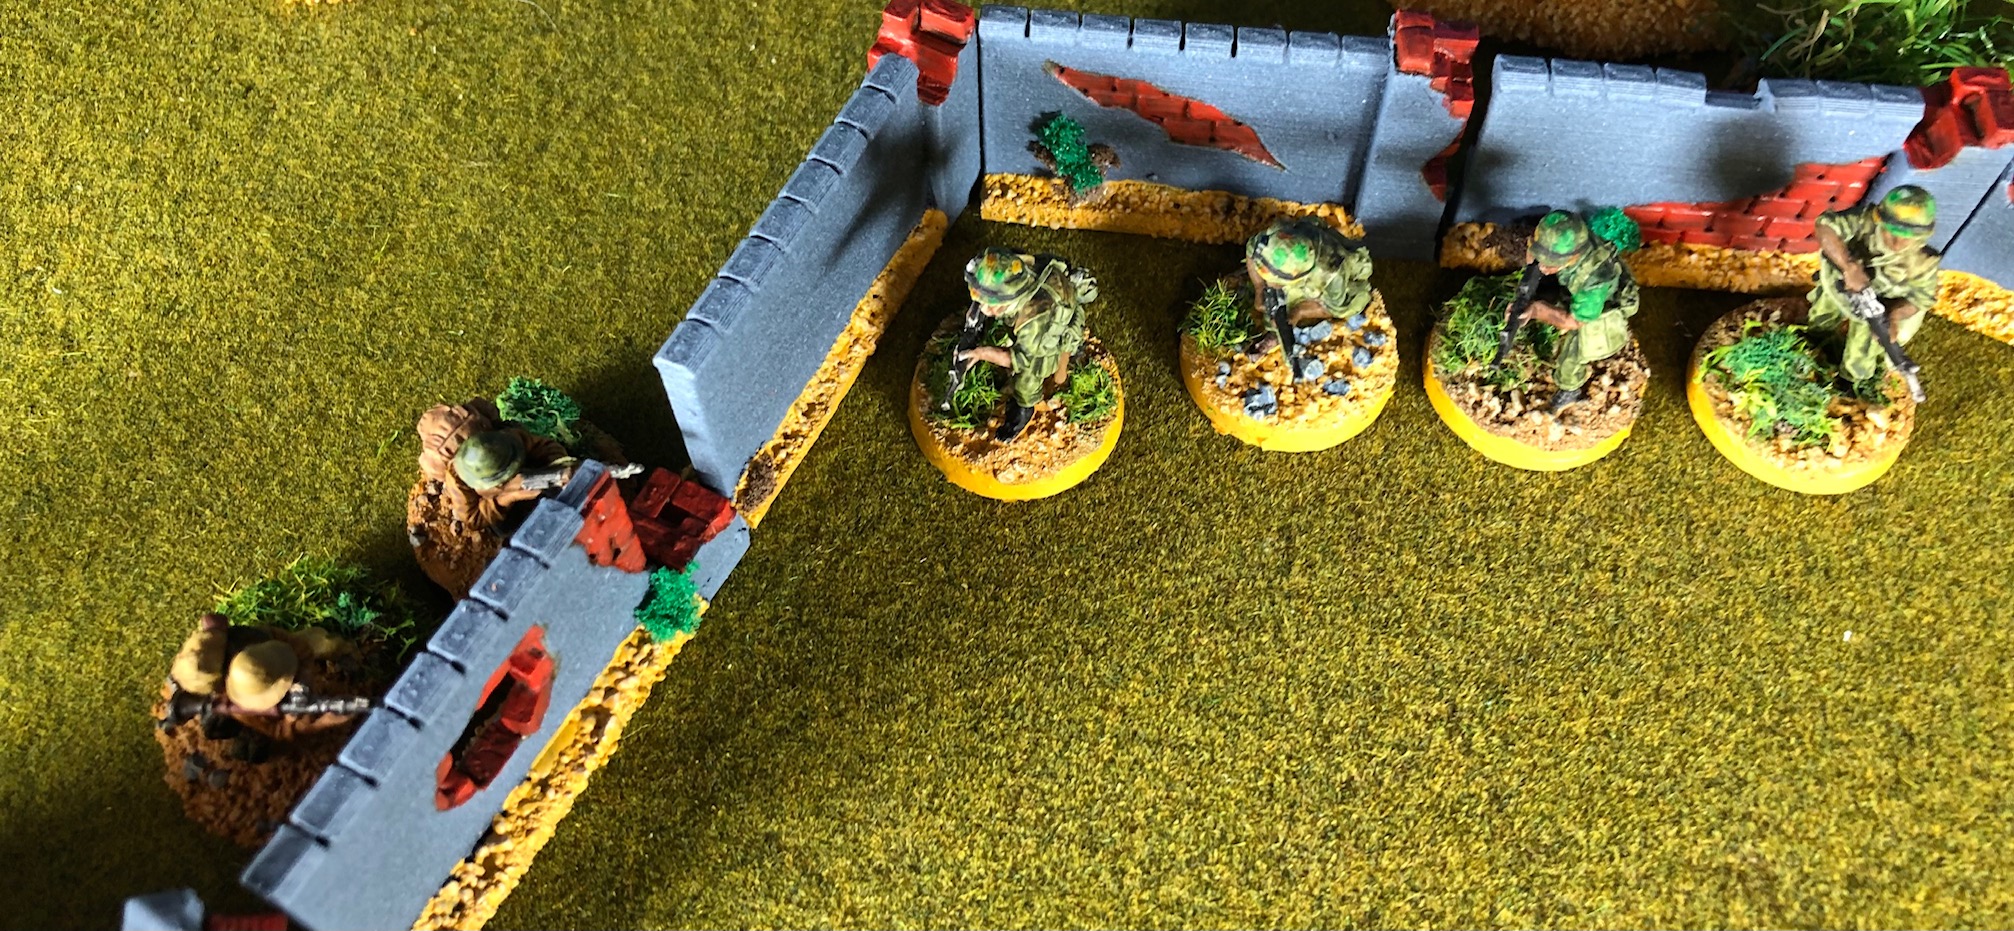
As I had a lot of shorter 3d printer filament pieces, too short for bigger projects, I printed these walls to finish them off with something useful. Walls like these can be used in between buildings or around parks and along streets. They are not only useful for my city of Hue project. So here they are:

The 3d stl files are from a WOW kickstarter campaign. I always based one wall and one pillar on one base to make them generic enough to be placed on my gaming boards in a multitude of ways.

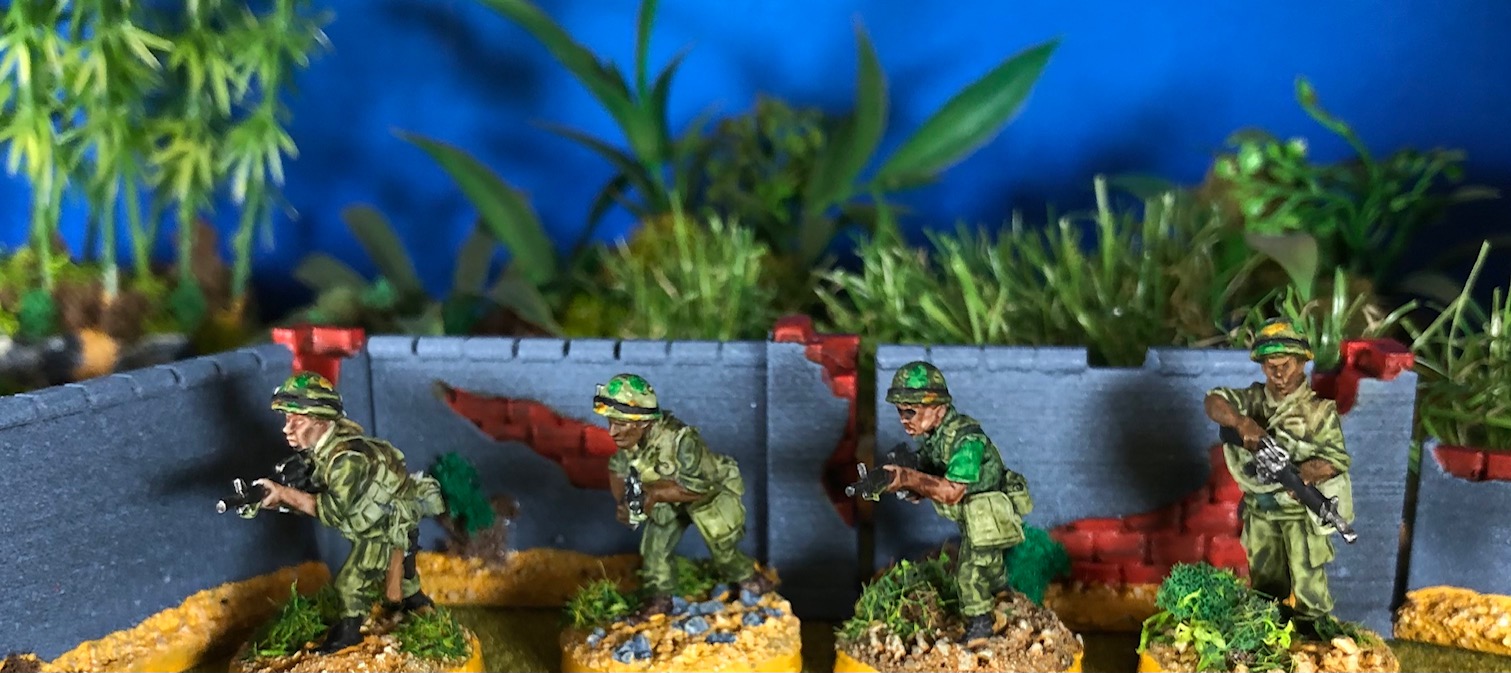
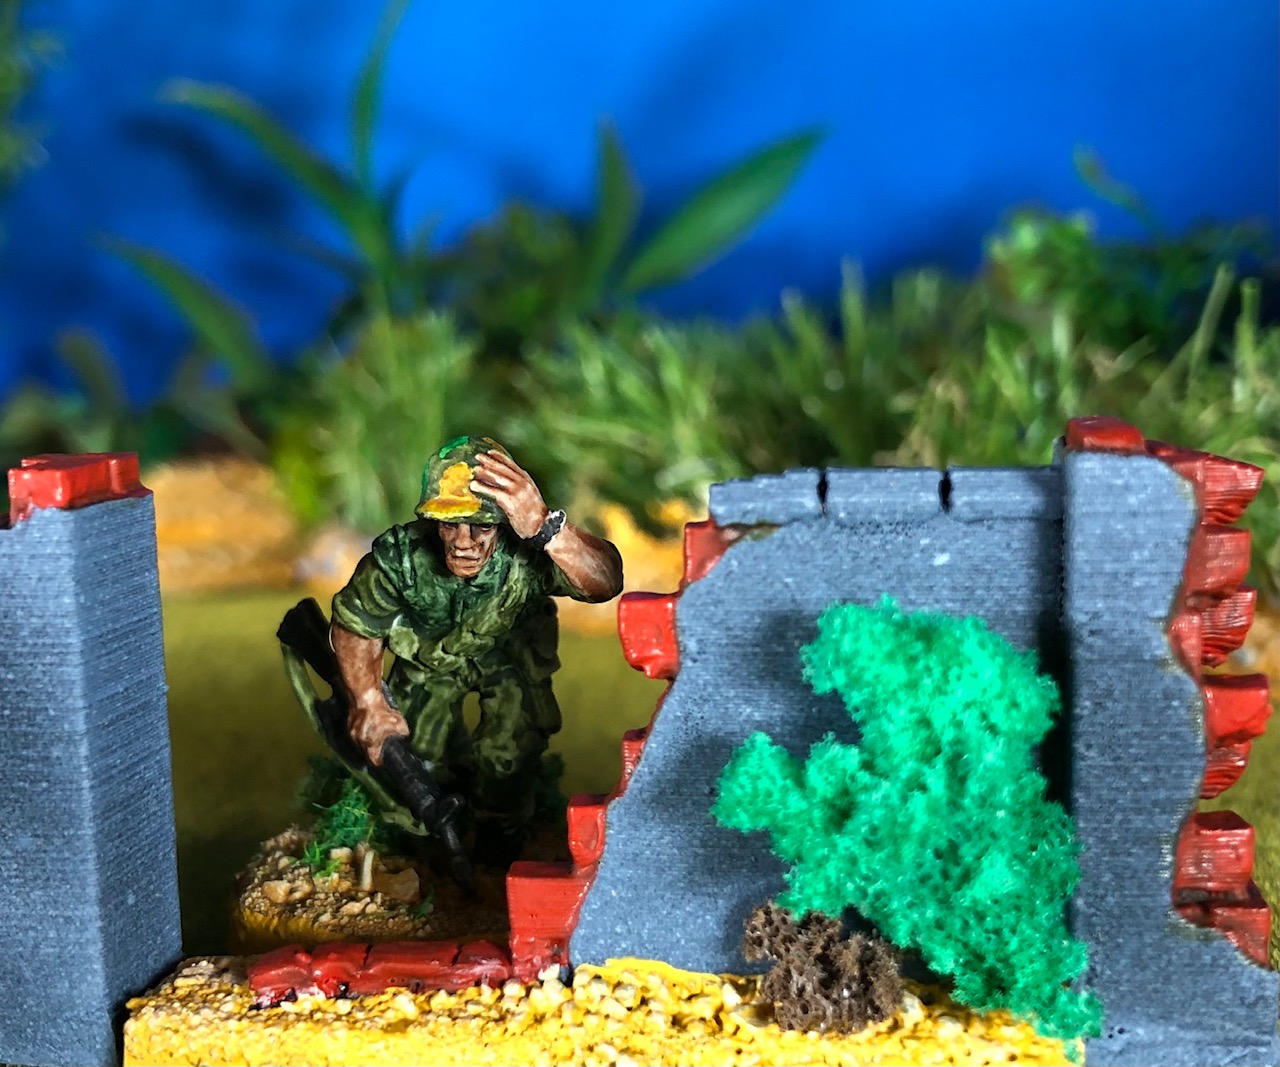
Here are a few shots of a US Marine fireteam looking for the NVA/VC or is it the other way round?

A bridge over a river

As I have build new riverbanks for my wargaming terrain I needed a bridge to cross the river. First of all I needed banks for the bridge. I build theses, as I build all my terrain tiles, from extruded polystyrene sheets. The bricks are engraved into the polystyrene. I added sand and gravel painted the banks and added self-made flocking material.

The Bridge itself is 3D printed the file is from a WOW Kickstarter.

Here are pictures of the different build stages :

The white sampans are from the WOW Kickstarter, too the dock is from cults 3D.

Here are pictures of the completed bridge:

I probably will ad some more dirt and algae to the bricks towards the waterline.

Tatooine buildings

My son is heavily into Star Wars Legion and I thought it would be nice to make some buildings for him.  So here is a short detour of my Vietnam War project. A Tatooine village.

IMG_6276

I printed the buildings on my I3Mega FDM printer. The files are from Thingiverse. There are loads of things to print for Star Wars Legion there. I glued the buildings and water vaporators  to PVC card as a base and painted them up with my airbrush. Very quick job.

IMG_6259

before painting.

IMG_6264

Partly finished

And a few more pictures of the finished stuff:

Have to do a little cantina and paint up the rebels from the core set and then it is back to the NAM.

Rice Paddies

I hope you are all safe and sound in this world wide pandemic! here in Germany the normal life doesn’t exist anymore and that is good to battle the virus. As we are more or less all at home and boredom will set in sooner or later , I will try to post something every other day to keep you a bit more occupied and to divert your thoughts away from Corona.

So for a start here is a rather big update. I finished my rice paddies for my Vietnam games.

I got the STL files from 3D Alienworlds.

Here are pictures of the printed paddies.

As you can see the paddy itself comes blank. So you can just paint it as an empty field or you can ad strips of rice plants to have a field with rice planted. The file is done to be able to ad artificial water effect to it.

As I didn’t want to use a water effect I changed the STL into this one:

IMG_5097

So now it looks like the plants are partly submerged. I will use paint and gloss varnish to create a water effect like i did with all my water features for my gaming table.

So here are pictures of the finished rice paddies:

IMG_5215

Without plants.

IMG_5214

With plants.

Some more pictures of my table layout with the rice paddies:

Next up lots of new NVA Soldiers!

Making your own clump foliage from upholstery foam

As i have to do some terrain for my ongoing Vietnam war project. I need a lot of clump foliage for my jungle terrain, so instead of buying it I thought about doing it myself. I know someone who does upholstery as a profession and he gave me offcuts of upholstery foam seen here:

IMG_2276

I cut it into smaller peaces with a pair of scissors and added these together with some water into a blender. I blended them for a few seconds and had this:

IMG_2277

So this doesn’t look like terrain clumps as the color is all wrong. So I put the still damp foam shreds int a bowl with household paint and some PVA:

IMG_2278

And this is what came out after mixing the foam shreds with the color:

IMG_2279

two different shades of green clump foliage and some brown:

IMG_2280

This took me about half an hour to do. The clumps have to dry now for 24h and will be ready to do a coarse scatter for the jungle bases and the bases of my miniatures.

This wasn’t my original idea to be fair, though I nicked it from Mel, aka the terrain tutor.

you can see a video by him about the process here

I will post more about my vietnam terrain as I create it.


The pub gets color

Yesterday I started painting the pub. The wood is done like I did the privy. the rest is done in a light brown were I added white in a few steps until plain white was reached.

img_1216

This is of course only the start all the windows have to be done as well as the roof and the stonework on the chimney etc.

The barn of the public house ( a start)

As you remember I started building a public house for my games . If you haven’t seen the pictures feel free to have a look here.

With the barn I try a different way of building the walls. I found this mold on Kellerkind Miniaturen a german shop for modelling supplies.

img_1077

With this mold you can do your own bricks from air drying clay like DAS.

I started build ing a “wooden frame” from extruded polystyrene . Next time I will try real wood I think.

And then I started filling in the gaps with my clay bricks:

This is how far I got last night. More to follow.


Building a Styrodur ( extruded polystyrene ) medieval public house

The next project I started , apart from the halfmen army, is this medieval public house. It can certainly be used for fantasy games ,too. When finished it will have a stable and an outhouse added. I used styrodur , an extruded polystyrene, toothpicks and teddy bear fur for building. First I build all the walls of the first and second floor and inscribed the detail of the wood into the door and wooden beams as well as all the stonework in the window and door arches as well as in the chimney.

The next step was the assembly of the walls and the floors. The base is a piece of MDF.

In the pictures you can also see the beginning of the construction of the roof.

Next I mixed some filler with black gesso and painted all the walls , in between the beams and around the windows and door. When dry you get a nice rough surface like seen in lime washed buildings.

Next step is to glue on the teddy bear fur on the roof to simulate thatch. This is only glued on at the moment, it needs to be straitened out a bit and has to be painted with a PVA mix later .

Here are some close ups of the wood and stone structures:

More when I have done a bit more work on it!

Here are the refurbished TSS tiles

So now I finished redoing the first batch of my terrain tiles. 8 river tiles and 11 hill tiles. There are a lot more tiles to be done as you can see on the pictures as I mixed old ones with the redone ones to build the table you see on the pictures. There are some more river tiles, open grassland tiles, track tiles and some settlement tiles to be redone or newly build over the next coming months . Here are the pictures !

img_9421

Hope you like what you see

Just realized that I didn’t put up a before and after picture:

The flocking of the river tiles is finished

I finished the flocking of the river tiles yesterday. On some pictures the PVA hasn’t dried completely, therefore it is not translucent everywhere . The grass tufts were made with the flockbox, the other flocking materials are from woodland scenics and Noch.

img_9378

The next step will be trimming the reeds and painting on the gloss varnish on the river proper.