Here I will talk about terrain for wargames. In my opinion good looking terrain is as important as well painted figures for an eye pleasing wargame.
I will ad links here to all the relevant articles about terrain building I published on wargamesgazette before. For me it is easier then to copy them all here and for you it is easier to find them!
Links about terrain building:
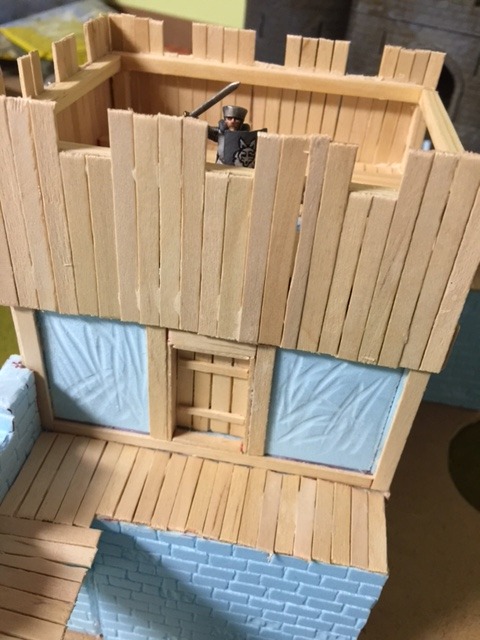
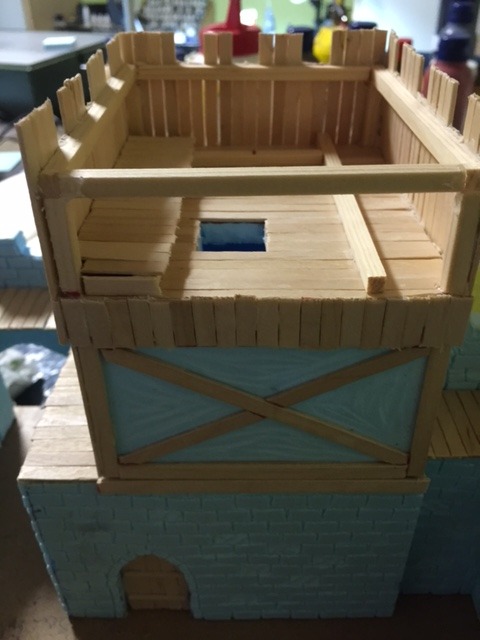
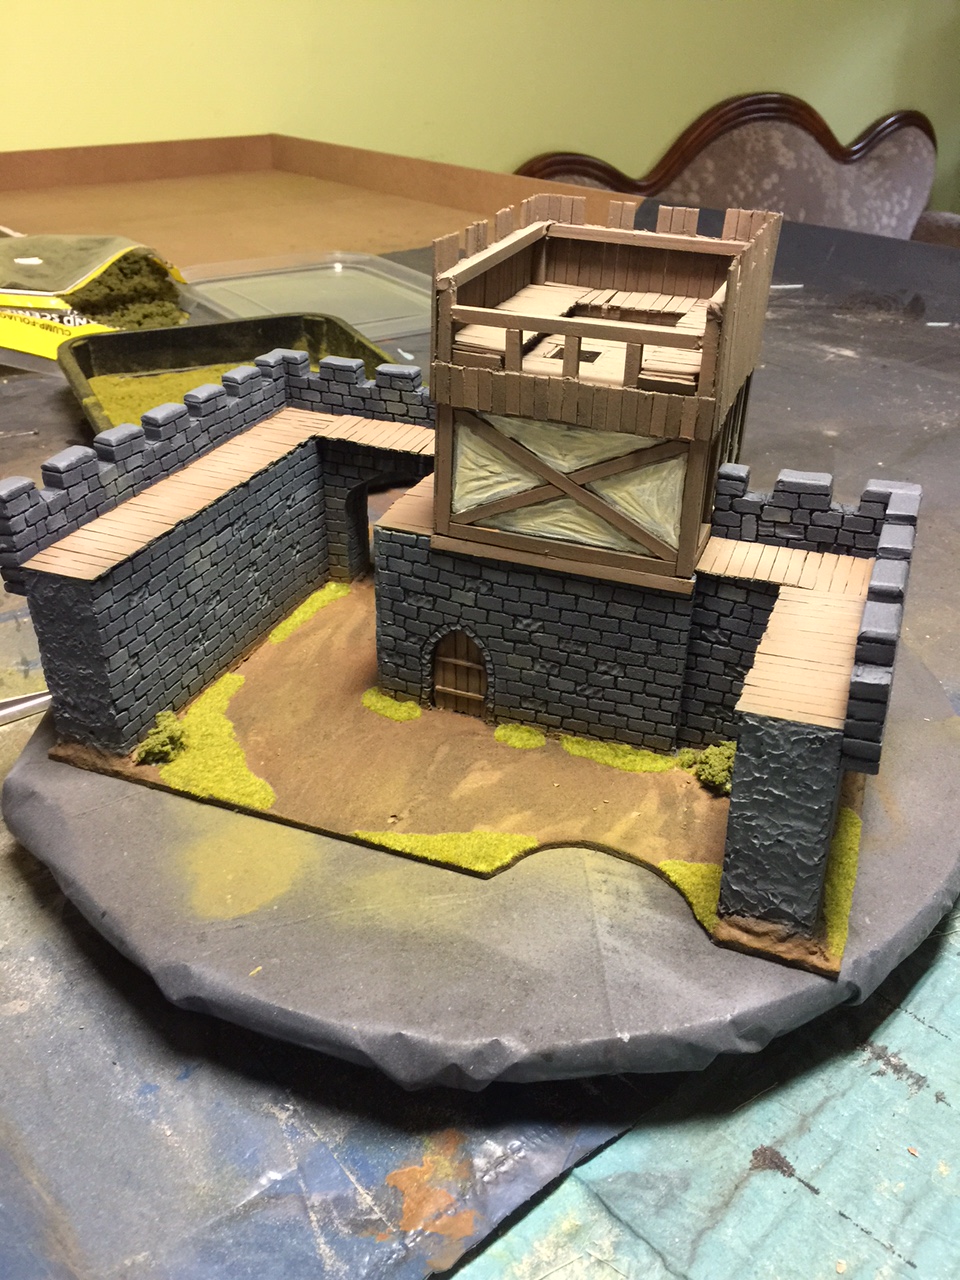
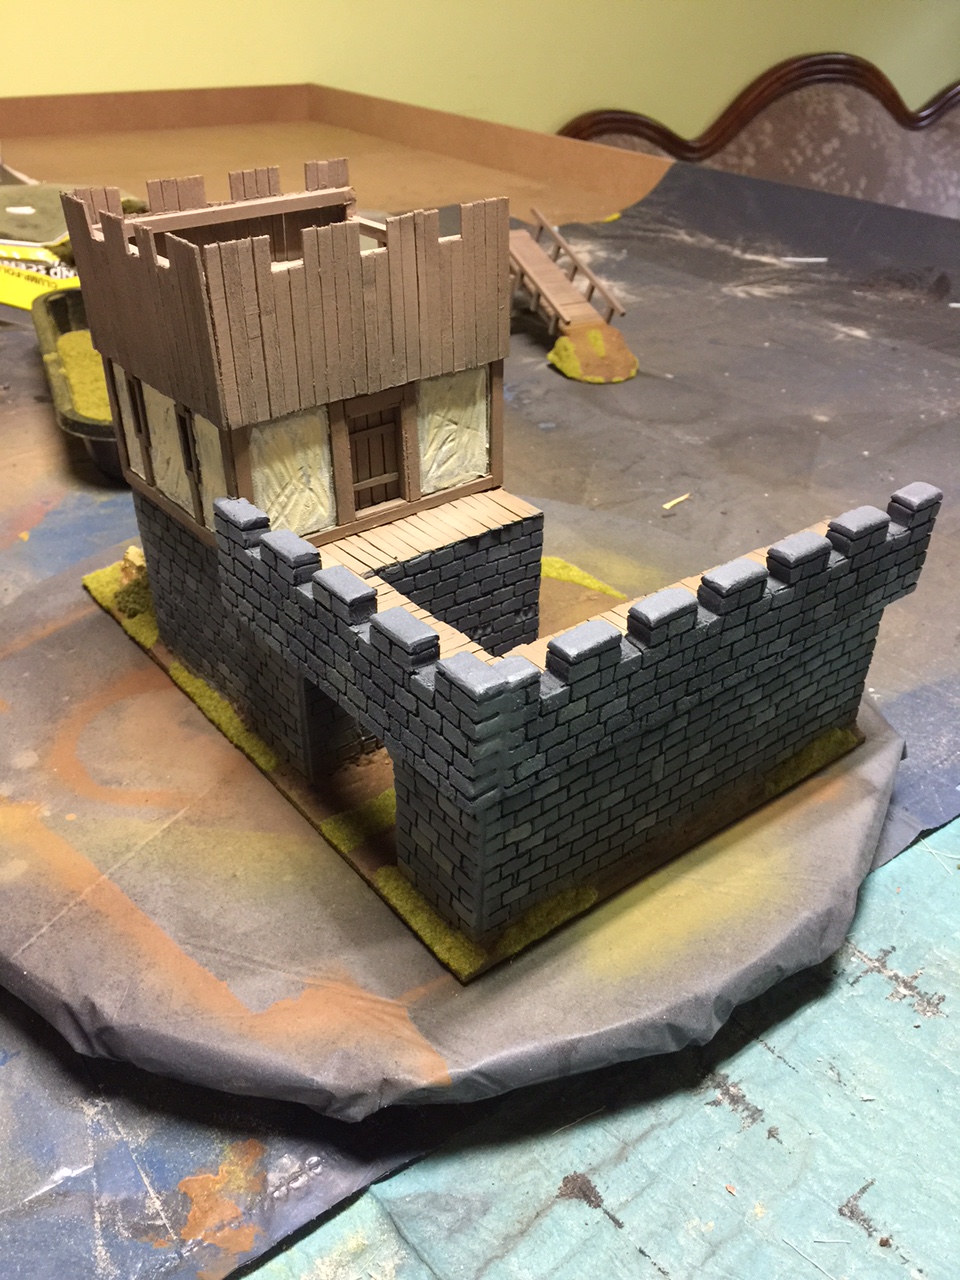
Building the barn and privy is finished!
Some more progress on the barn and the privy
The barn of the public house ( a start)
Building a Styrodur ( extruded polystyrene ) medieval public house
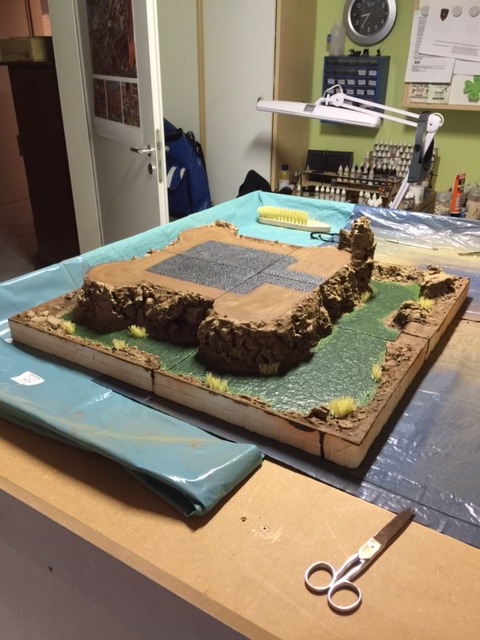
Here are the refurbished TSS tiles
The flocking of the river tiles is finished
The TSS tiles before flocking commences
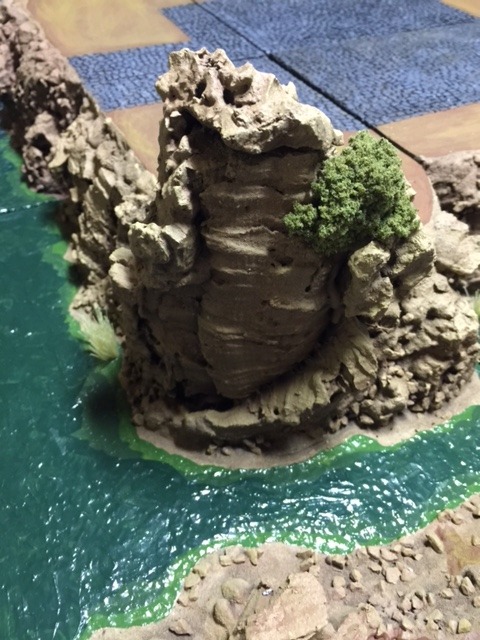
Started coloring the rock faces of the hills
Completed the earth shades on my Hill tiles
Another step in building my terrain contour hills
I used old TSS tiles to build Hill contours
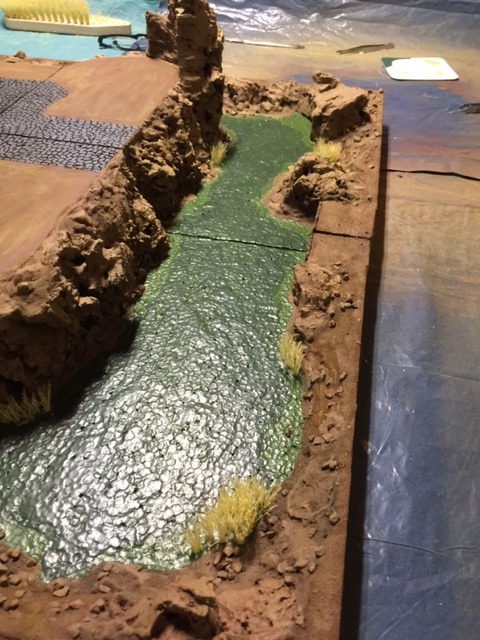
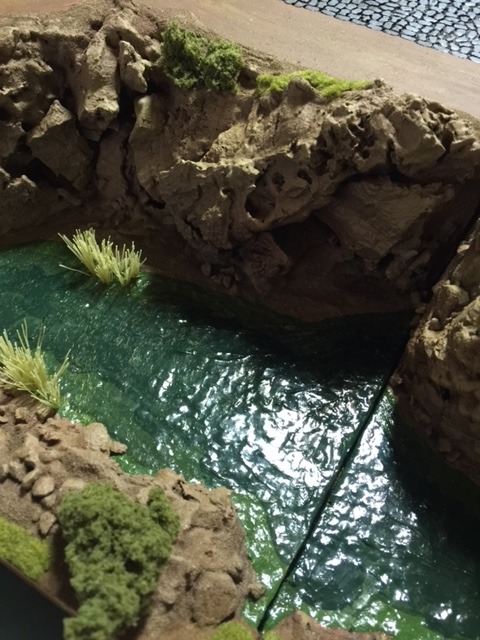
The next step of the renovation of my river tiles.
Next step in redoing my TSS river tiles
Finished of the wire wool trees
New stamps for representing stones on Styrodure and a template for roman doors and windows.
Rhein in Flammen (Rhein in Flames)
The Flockbox
I got a Flockbox for x xmas which can be used for making your own grass tufts or for flocking your terrain.

“”The Flockbox is a unique and versatile flocking device that allows flocking of small to medium size objects at a fraction of the cost of purchasing a commercial flocking device.
‘Flock’ is nylon fibres like fine hair and is available in a huge range of colours, it is used to create the velvet feel on objects such as jewelry boxes, car dashboards, toys or longer flock can be used to create realistic looking grasses in miniature.
The Flockbox uses an electrostatic charge to attract the flock fibres onto your glued surface resulting in the fibres standing on their ends in the glue to produce a carpet effect.” Quoted from the manufacturers site.
You can find more info here
Here are some tufts I made with the flock box:


I haven’t tried flocking terrain directly but I will post the results here when I did.
If you want to make your own tufts this device is recommended !!
A background for my miniature photos

I got fed up with my brown background for taking pictures of my miniatures. Therefore I build a terrain piece with a blue background for taking pictures on. I don’t have to dismantle this terrain piece as I can set it up permanently with appropriate lighting. This safes me time in taking pictures as I don’t have to set up everything every time.
Here is how I build it:
The terrain tile was basically build out of Styropor and cork as you can see here:


Then the Styropor surface was treated with a coat of filler:


Then coarse and fine sand was glued to the dried filler:


Then the terrain was painted using an airbrush:


And grass tufts and Woodlandsenics scatter added. I painted a blue sky background to go with it:


This is the complete set up with lamps as I use it for taking pictures of my figures in the future:


Hope this is helpful for building terrain and for taking pictures alike .
I will do a tutorial on how to take pictures in the future.
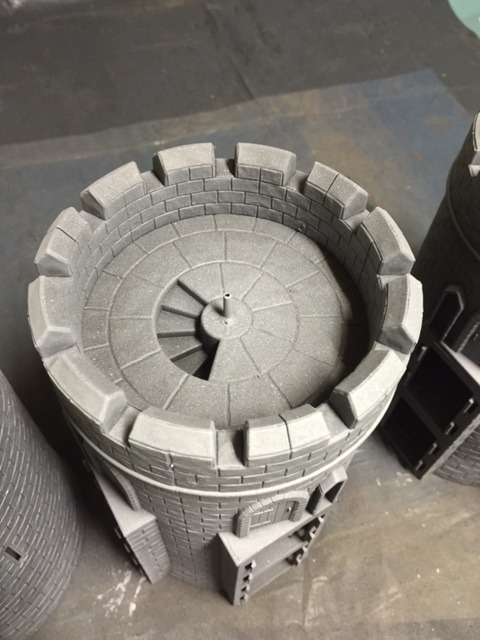
A Castle for my GoT / medieval army
For christmas last year I got a plastic castle kit by tabletop workshop . This producer of plastic terrain pieces is sadly now defunct. At least last time I checked the domain was for sale.
Anyway the kit is really nice to build and very modular. So you could build many different castles . I got the standard set .
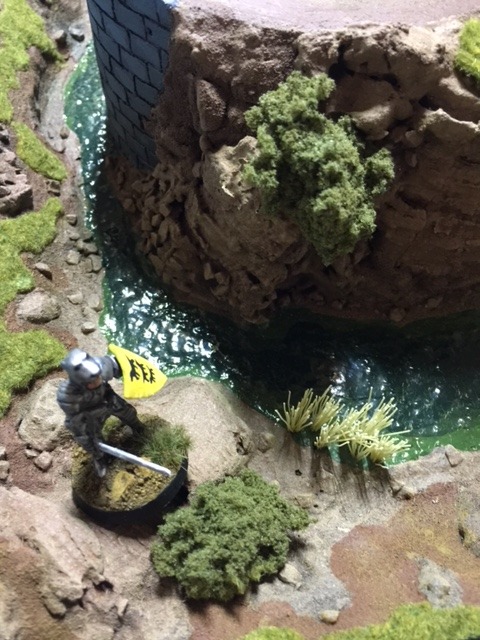
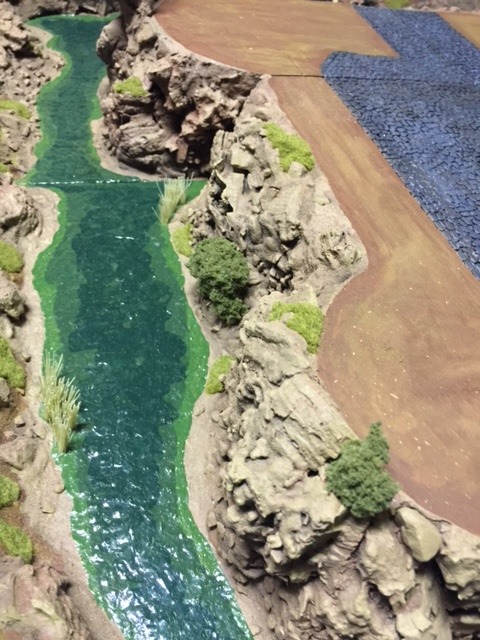
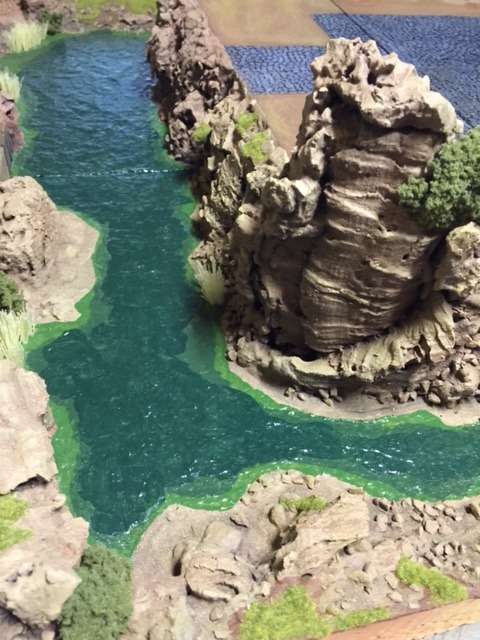
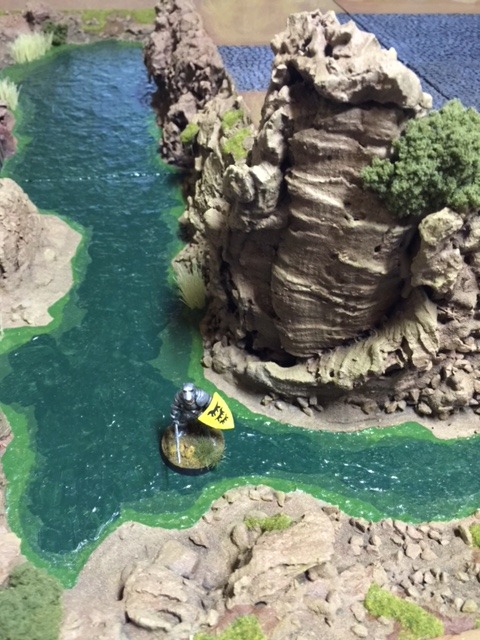
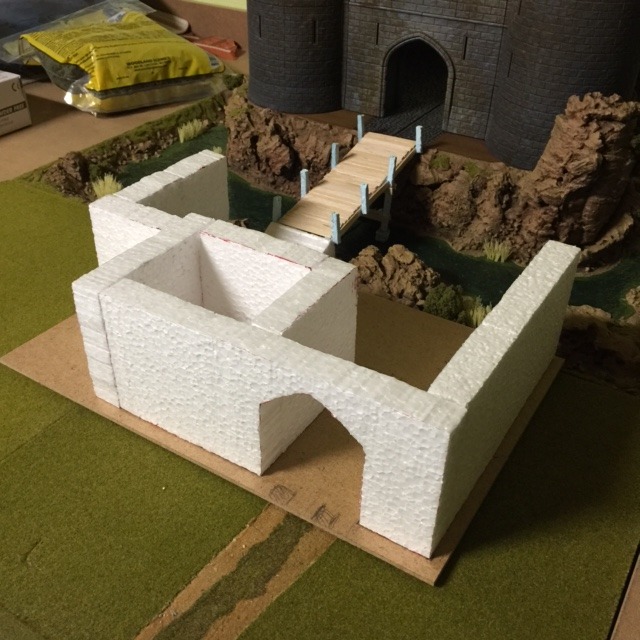
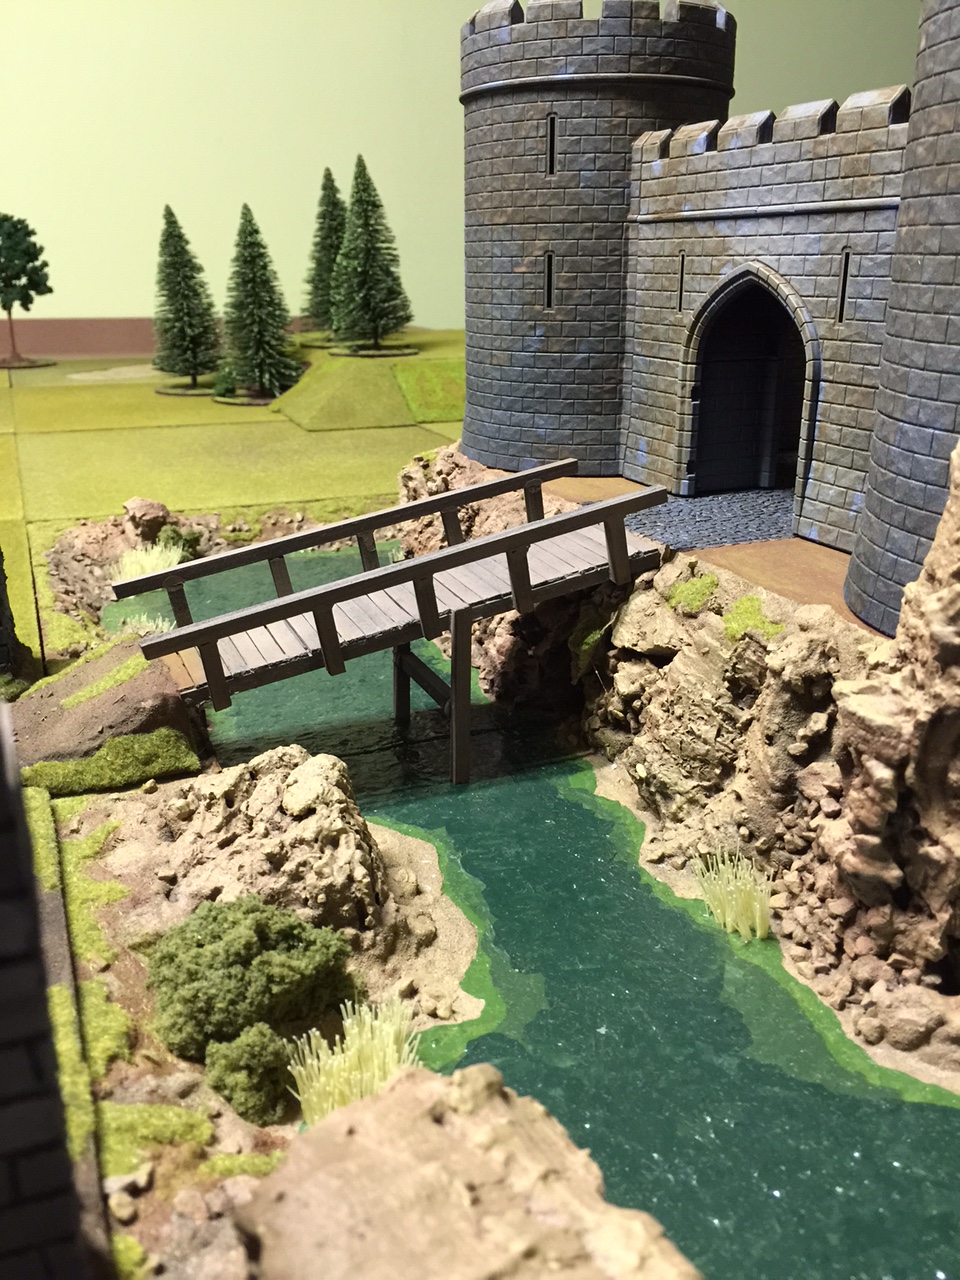
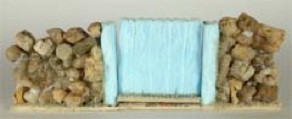
First of all I build the castle and then thought about terrain tiles as a base which would fit my existing ones. I wanted to place the castle a bit higher up then the other buildings on my gaming table so I came to the conclusion to build a small hill with an enclosing moat to place the castle on.
Here you see pictures of the bisected castle on the styropor tiles:


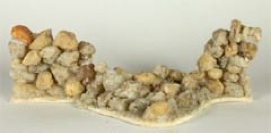
Then I started to build up the surface of the cliffs out of cork. These were fixt with a hot glue gun.
The next step was to build up terrain with filler . I colored the filler to better be able to see were filler is still missing and I feared chipping during gaming use later. I wanted to prevent white filler from showing up.
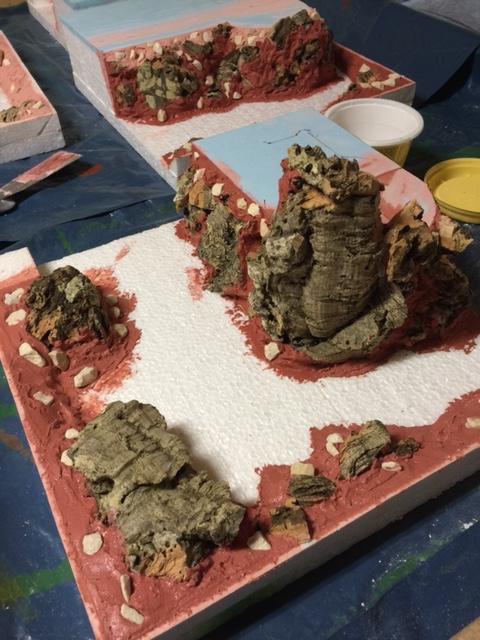

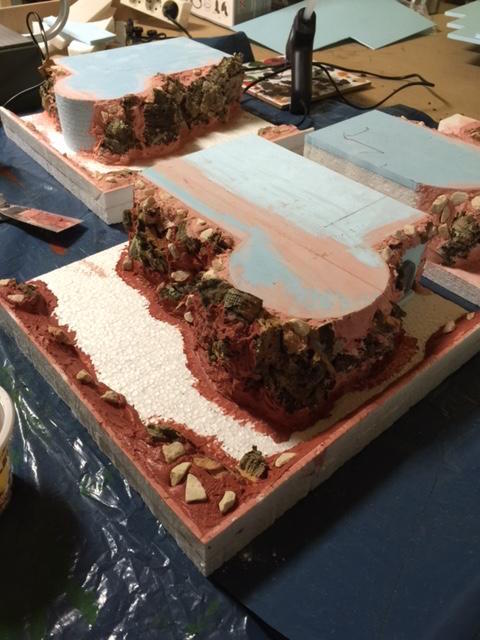


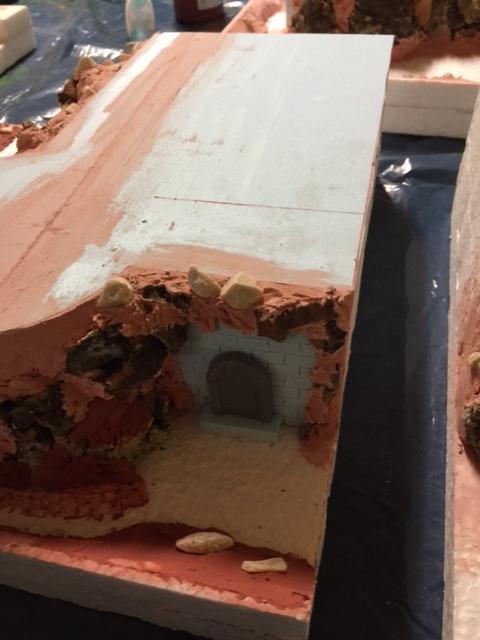

As you can see I glued blue foam to the Styropor in some places to be able to carve stones into the surface in some places which you can’t do with Styropor. Here in Germany Styropor is much cheaper then blue foam, so I build the base out of that stuff.
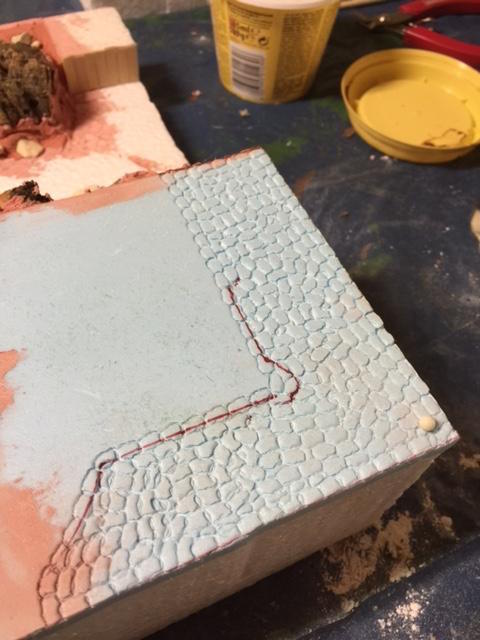
Then I started the painting of the tiles:

What do you think this brush was fore?
As you can see here I made reeds out of the bristles.


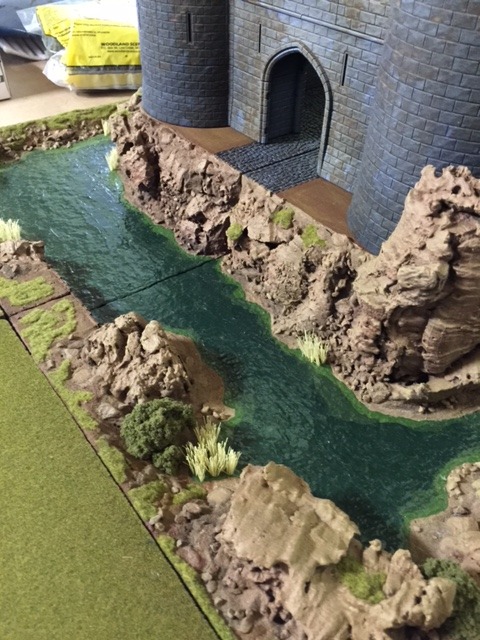
As you see the water in the moat doesn”t look like water at the moment . I coated the water therefore with gloss varnish.
Be very careful when you chose the varnish to use as most of them dissolve the foam!!!


I think now it looks more like water.
Then I added more vegetation like grass etc. On some of the pictures I added a figure (28mm) to show you how big the tiles are.


This finished the building of the tiles. Now on to the painting of the castle.


I used an airbrush to paint the castle as I did the tiles. There are 10 different shades of grey 😉 used to paint the castle.
Then the castle was weathered with different inks to make it look older.
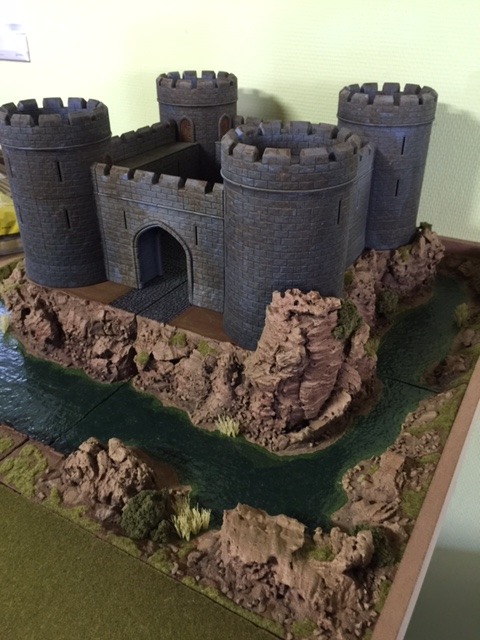

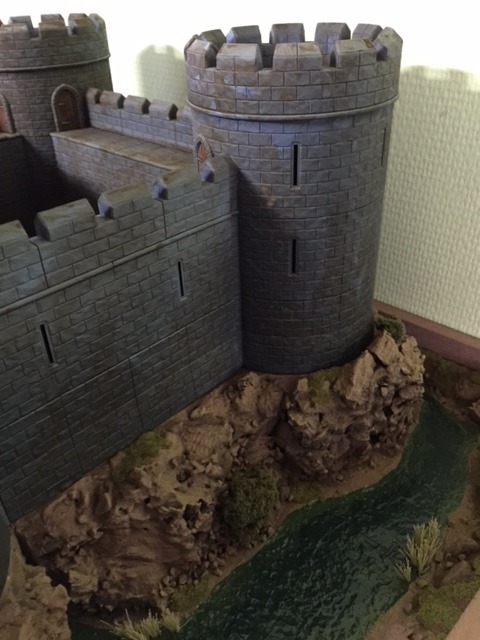

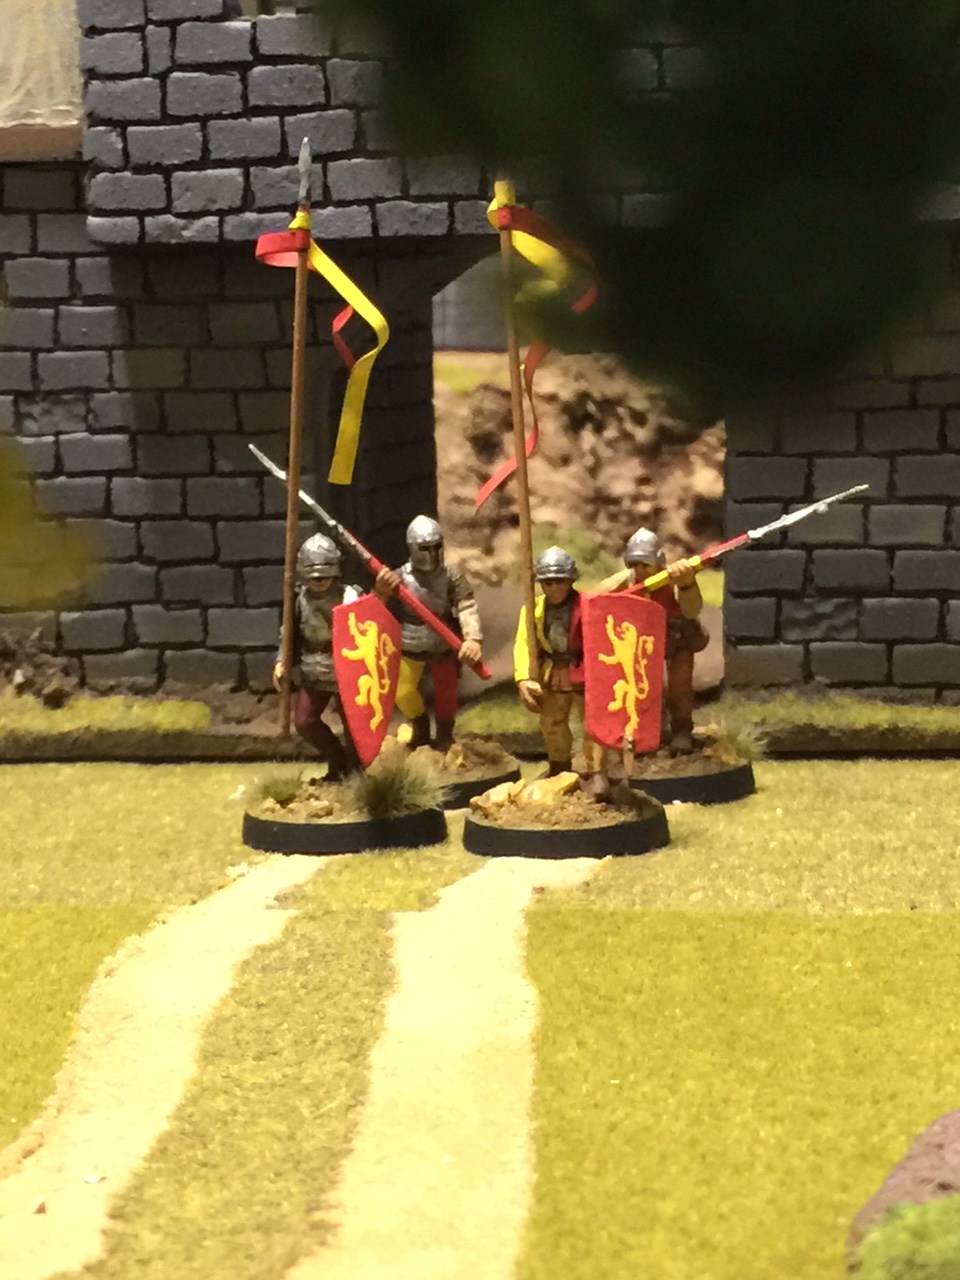
In the above pictures you see the finished castle on the terrain tiles.
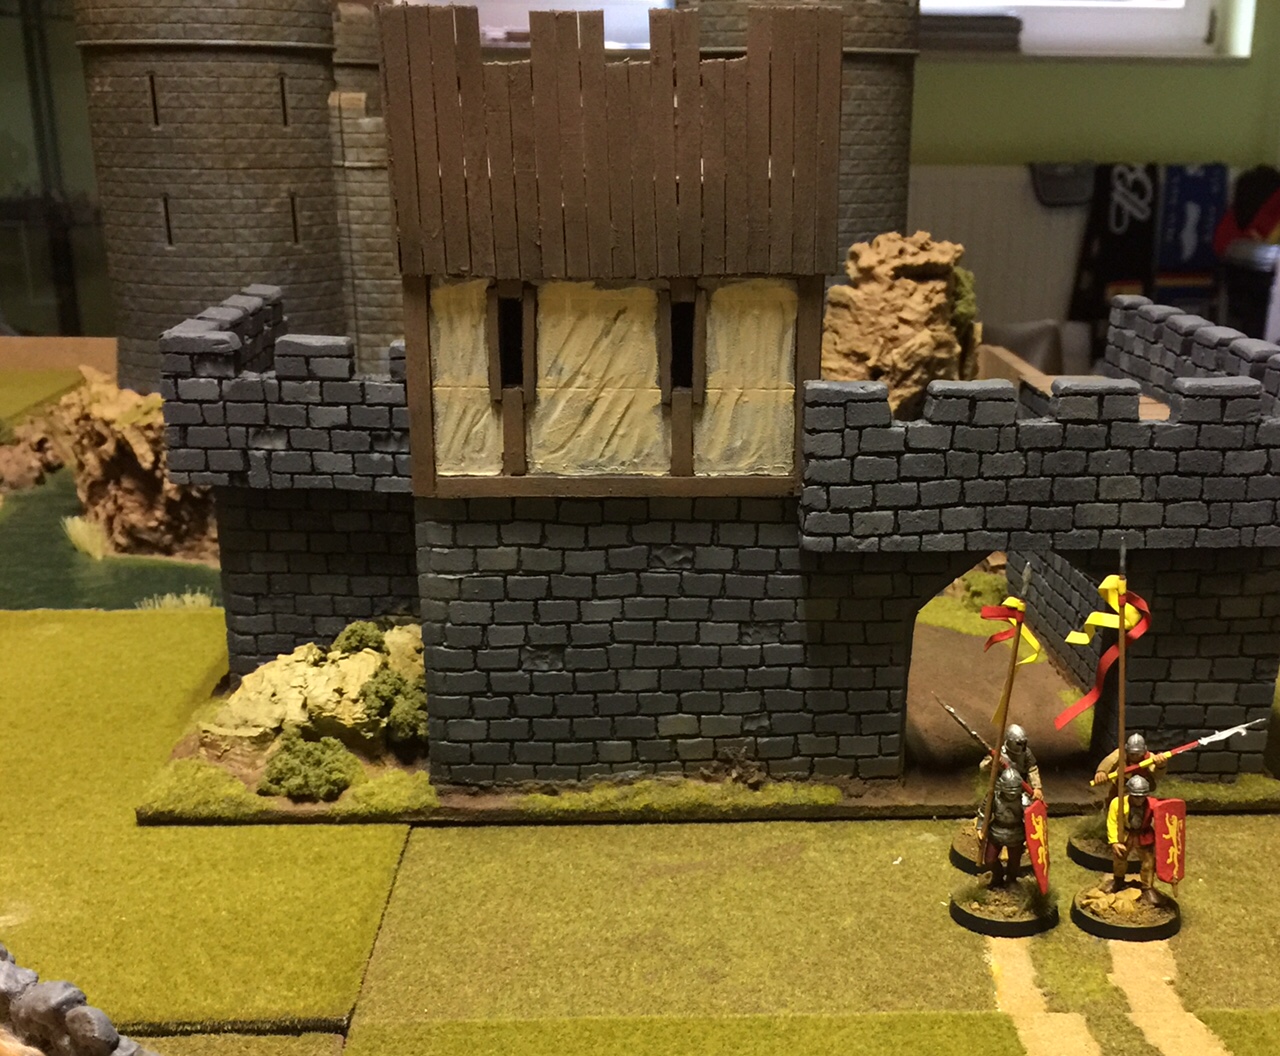
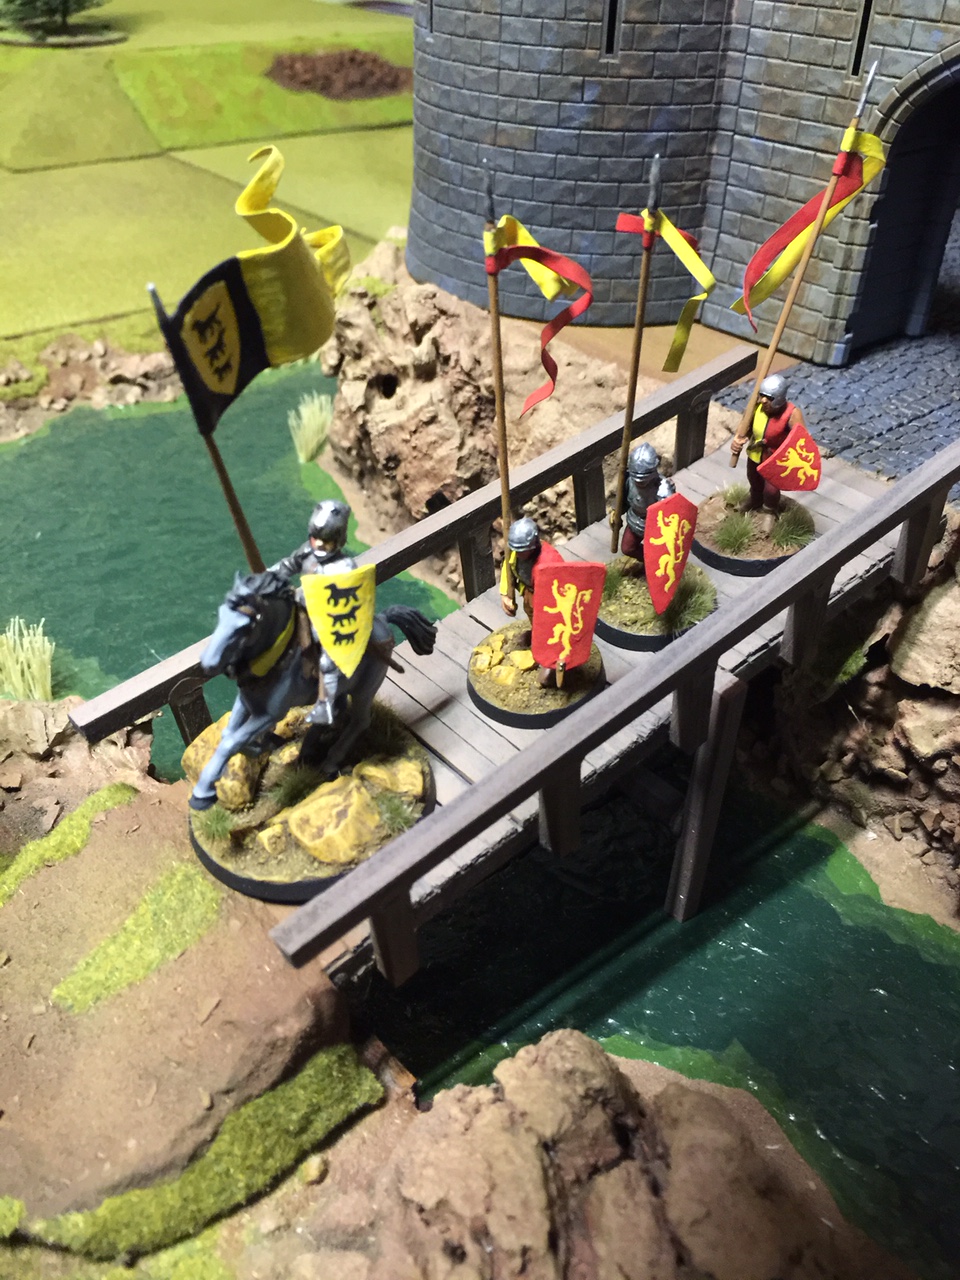
So now how do my knights and sergeants get into the castle? I had to scratch build a bridge. Then how will the bridge be guarded on the other side of the moat?
There had to be something like a outer battlement. This had to be build from scratch too as tabletop workshop was defunct and I couldn’t get hold of any other parts.
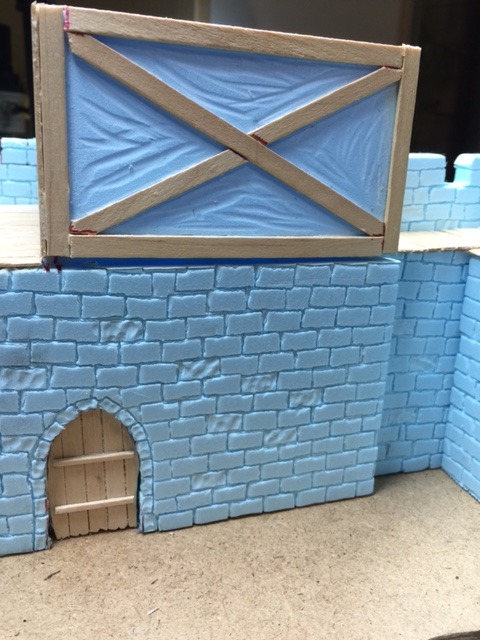
So I started again by building the battlement out of Styropor and the bridge out of wooden coffee steerers.

Like with the terrain tiles I clad the Styropor in blue foam and started carving stones into the foam . the wooden beams were made out of coffee steerers again.


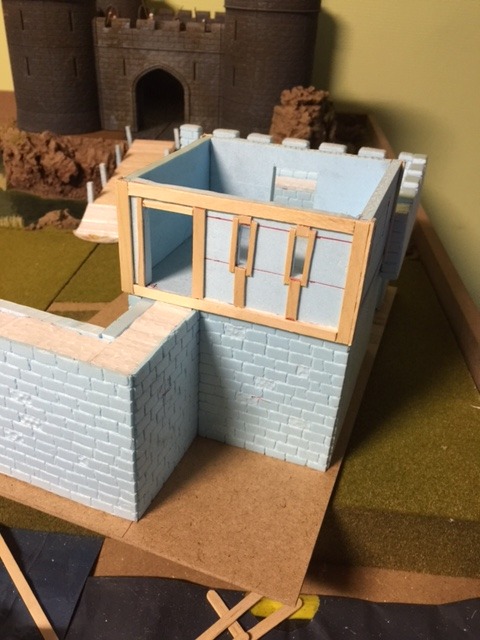


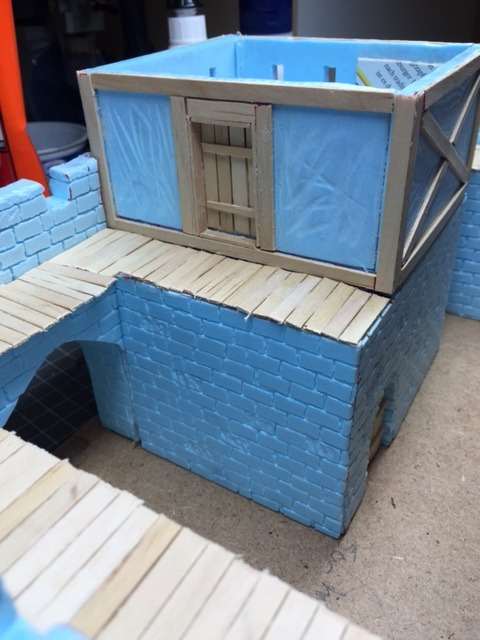
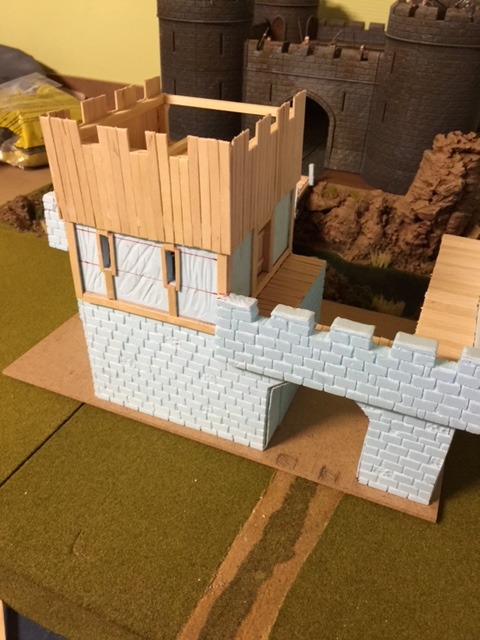
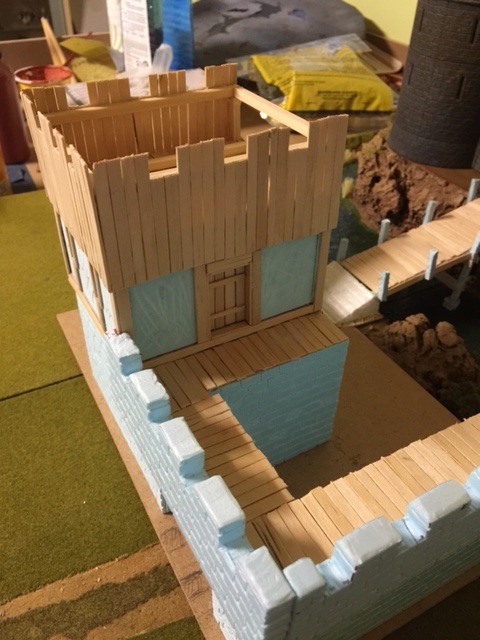
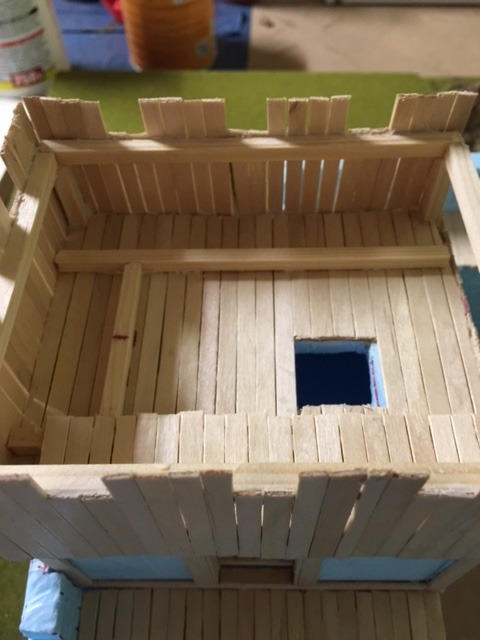


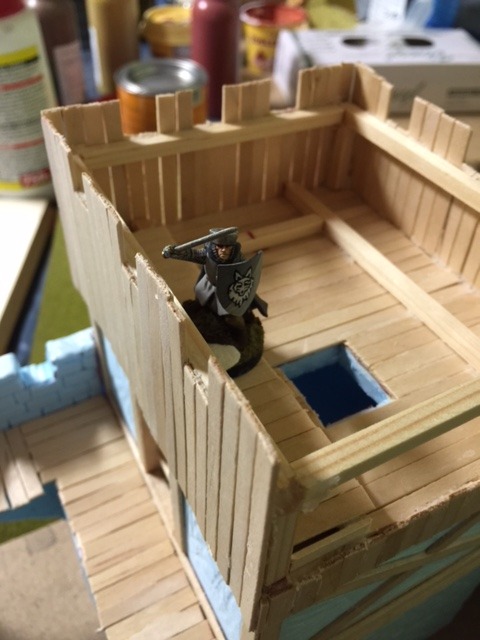

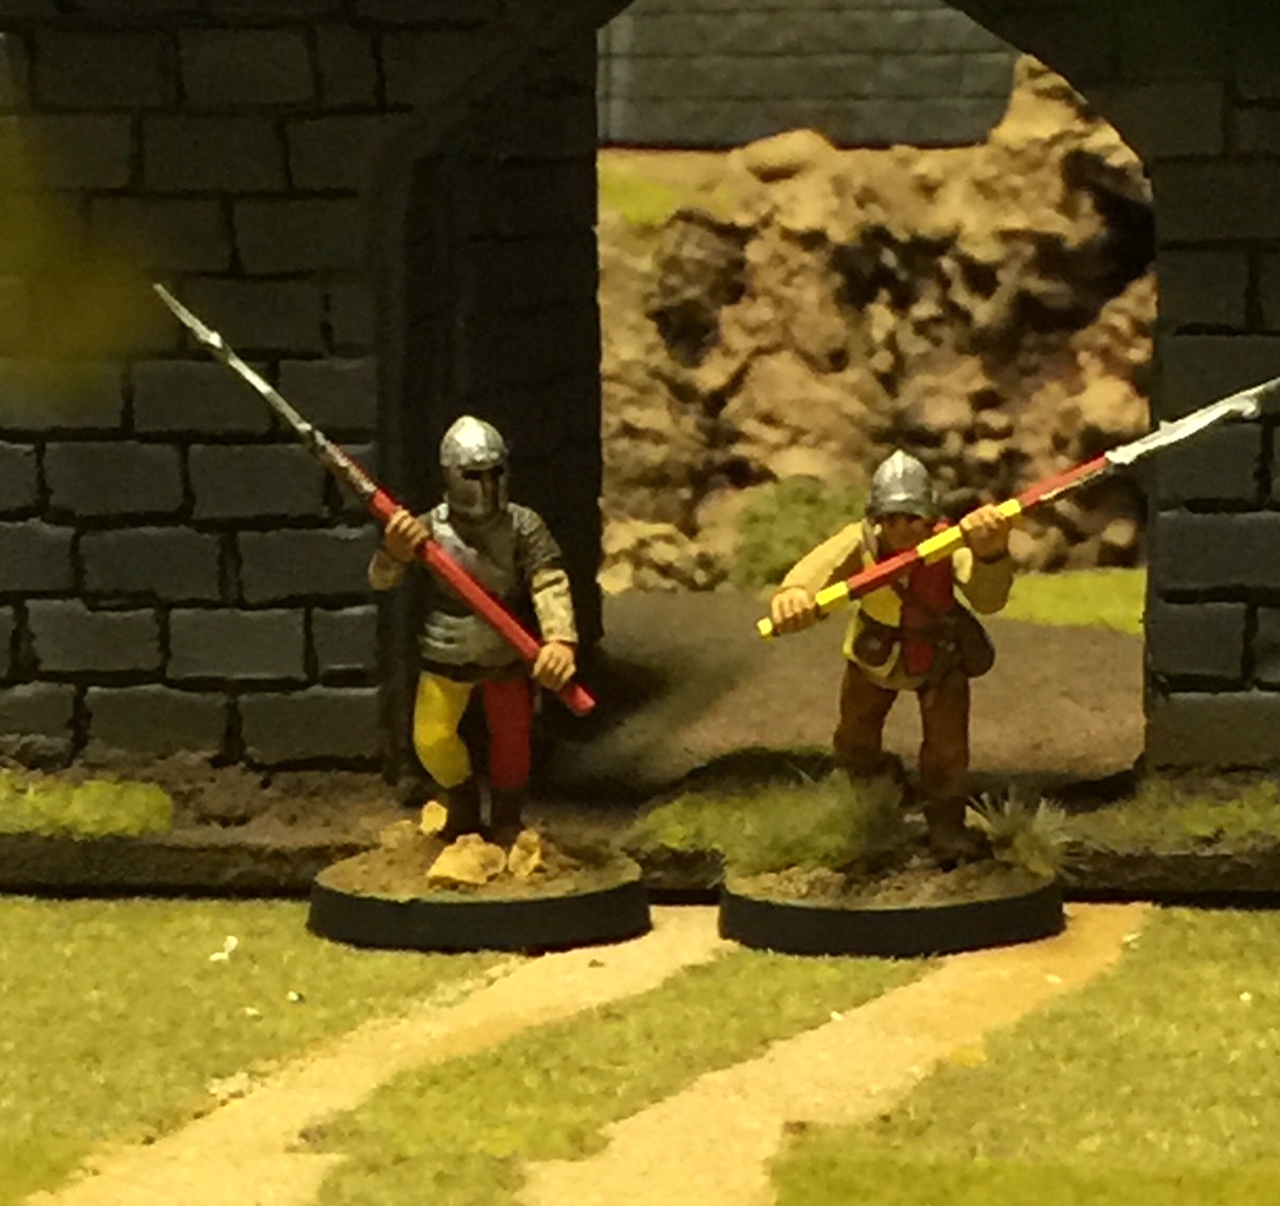
As before I placed a figure on the battlement so you can better judge how big it is.
Then the building was painted again with an airbrush . I place my bigger models on a turn table while airbrushing so I don’t have to touch them during the process .


I hope this article shows that it is not that difficult to build bigger features from scratch just go for it! If you have any questions about the building process just ask!
Here are some pictures with the terrain in action:


Building cover for your troops
As I am playing Bold action by Warlord miniatures , I need a lot of scenery!
If you do not know Bold action it is a squad or platoon level wargame set in WWII.
As troops die very quickly in this system without adequat cover I started my terrain building project with fieldwalls.

I started by getting small stones from a hobby store . They are normaly used for
decoration purposes and a bit of cardboard. I cut a strip of cardboard about 1x10cm
big and started to glue the stones with superglue to the cardboard adding row after row
I did 4 different walls two strait walls, one wall with a wooden door and one destroyed wall section .
The door and the doorposts are made out of styrofoam . The Styrofoam was inscribed with a woodgrainpattern.
As I wanted more then 4 wall sections I started to do silicone moulds to be able to cast the walls in resin. To protect the wallsections they were primed with black Gesso ( a primer normally used for oil paintings)

After priming I started to make the molds.
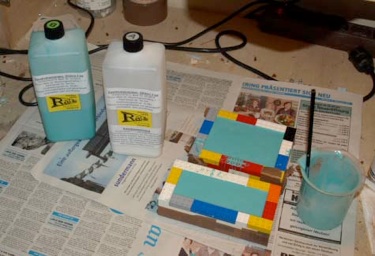
I build a box out of lego bricks and stuck a cardboardbottom to the box with tape. ( The bricks are reusable). Then I placed the walls in the box and fixed them with superglue to the bottom. If you don´t do that the master may float up durig pouring of the resin and the mould doesn`t work later.
I use silicone and resin by Rairo a German hobbystuffprovider.
When the silicone is set ( after about 2 hours you can get rid of the box.
Here you see the mould of the broken wall section. to use the whole mould space I put in 2 mine markers I made ( the black round things!). Now you can start casting the walls and the door.

Here are a few sample pictures of the cast up wall sections. Of course they are useable for different periods not only WWII.


Timelines saxon house 28mm
 Timeline is a relative new workshop producing MDF laser cut buildings in 28mm, 20mm and 15 mm scale.
They are very affordable and easy to build. They even include teddy bear fur for thatched roofs were necessary.


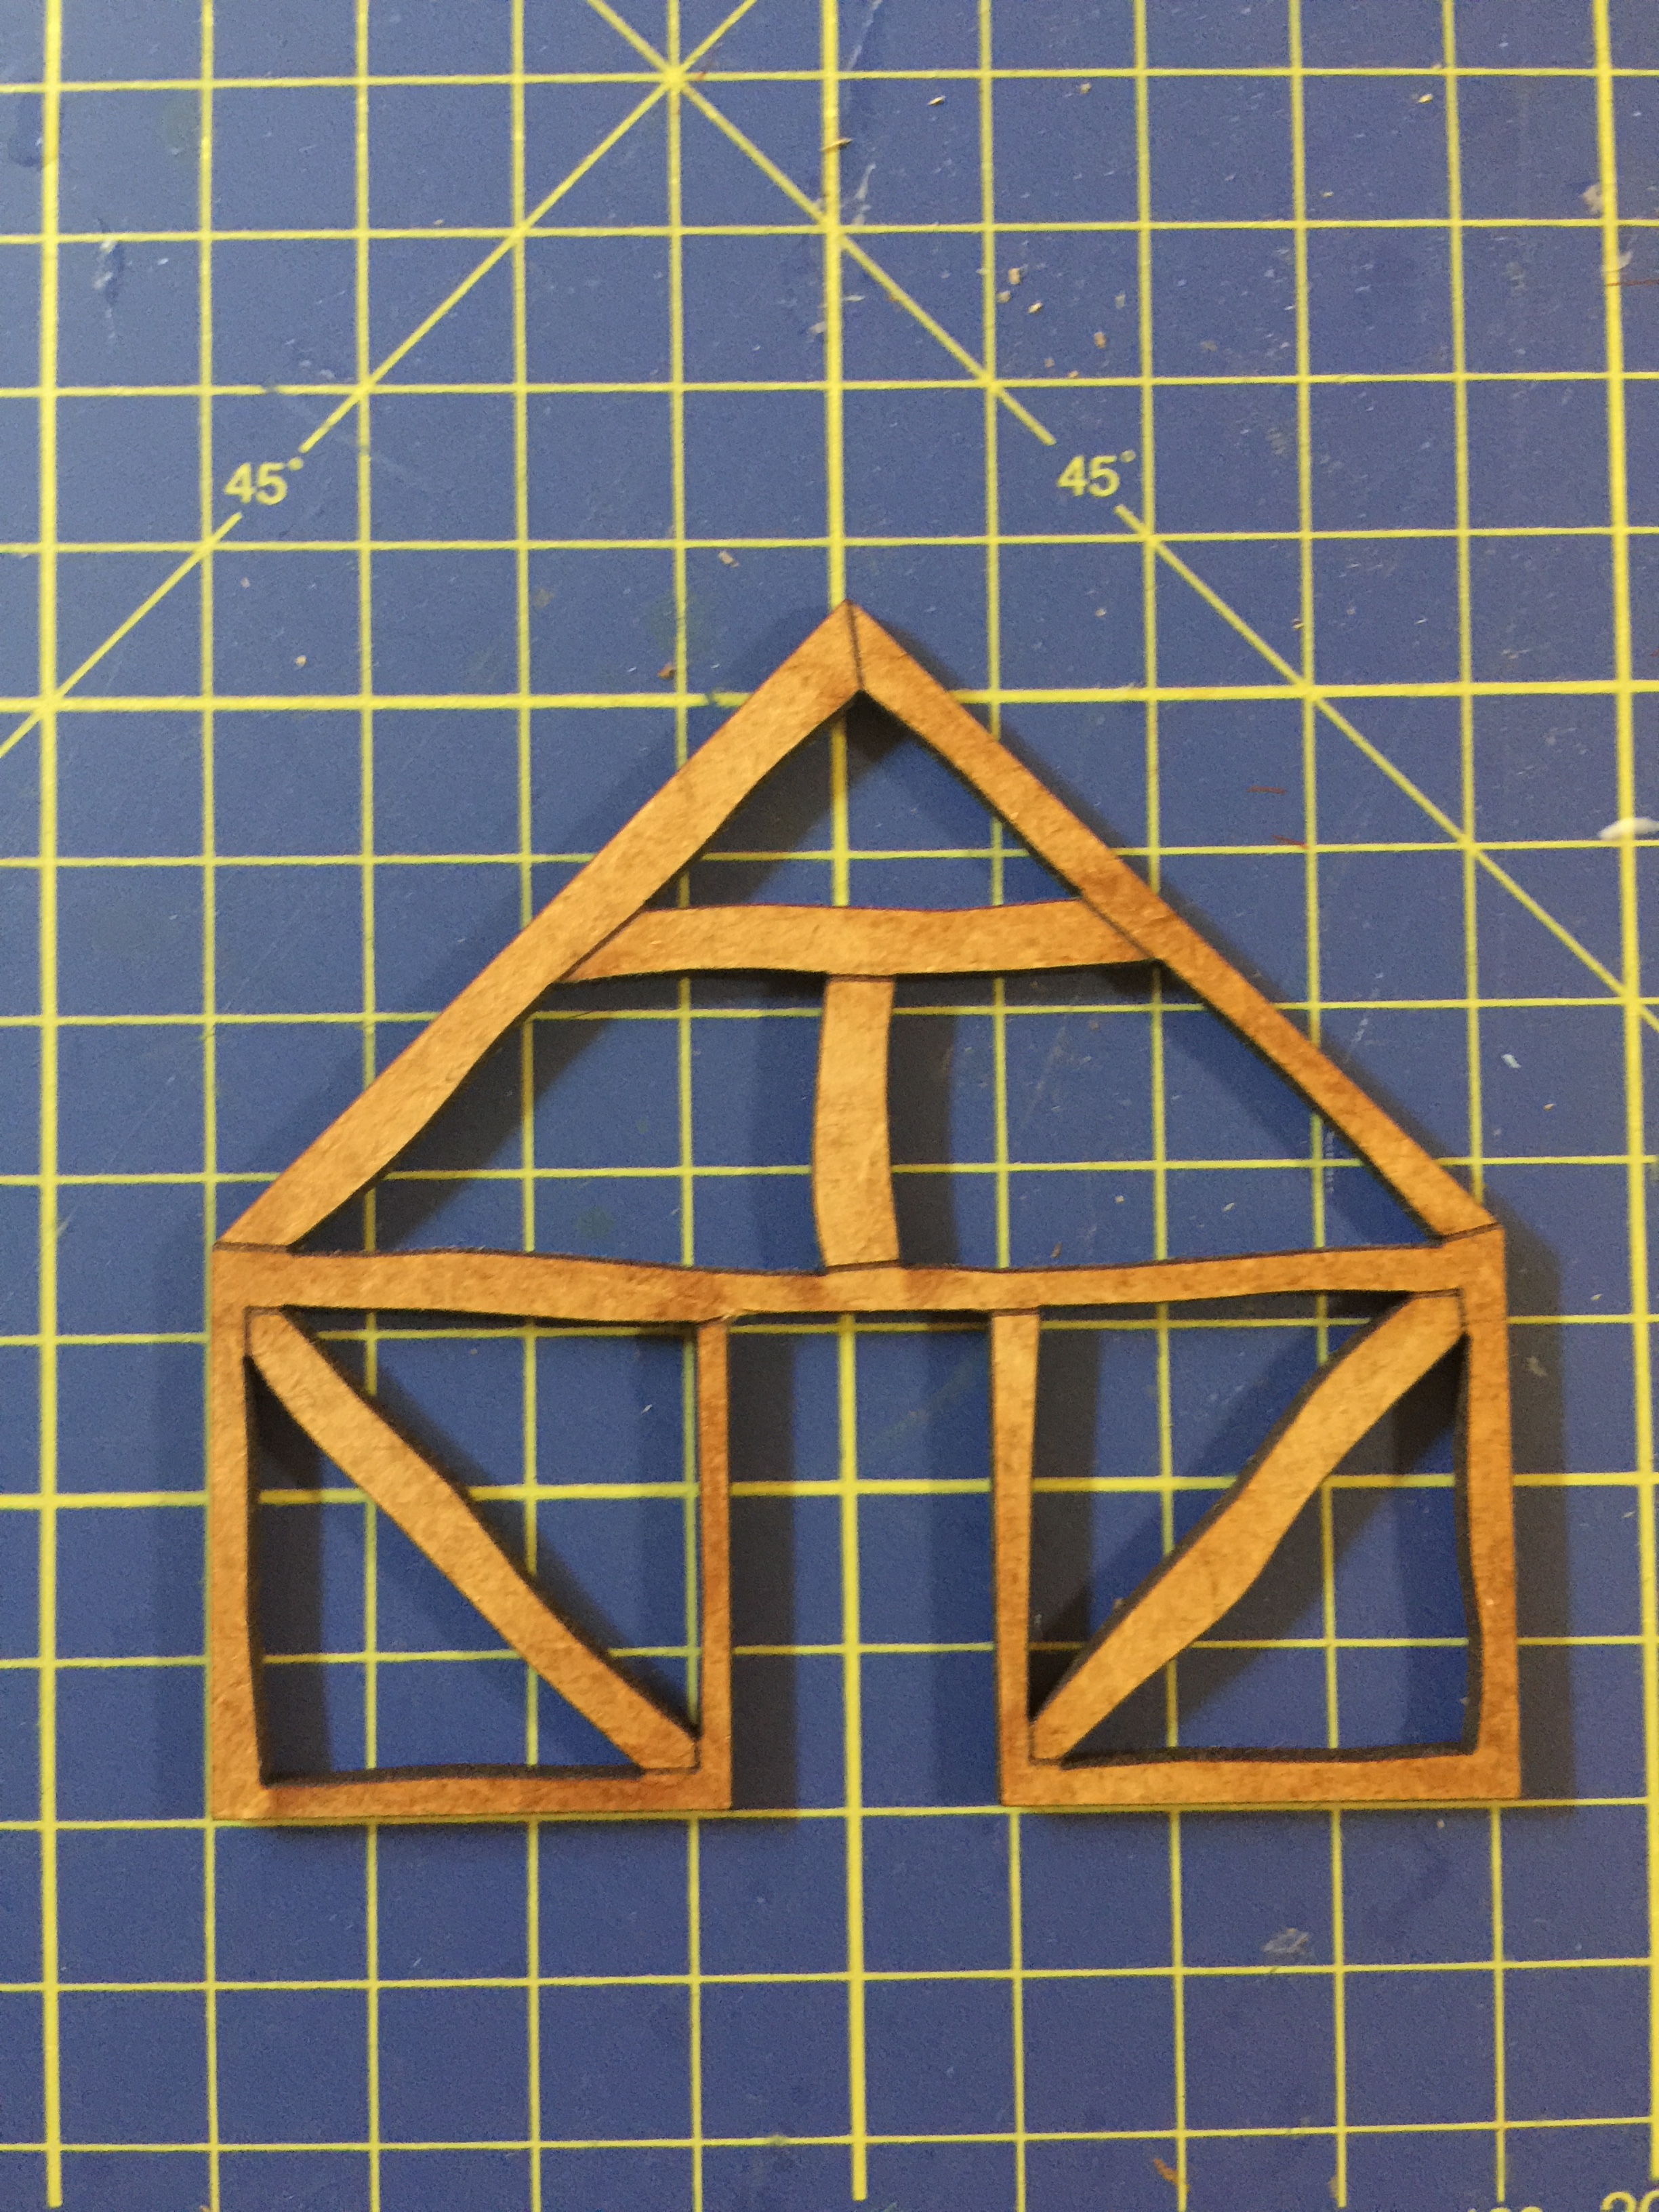
 I got the saxon house in 28mm for my birthday from my daughter and I will show here what the kit is like.
The building comes with a base. You get two wall halfs for every side of the building. So you glue the wooden beam sections on the solid wall sections wich gives a very nice 3 dimensional building.

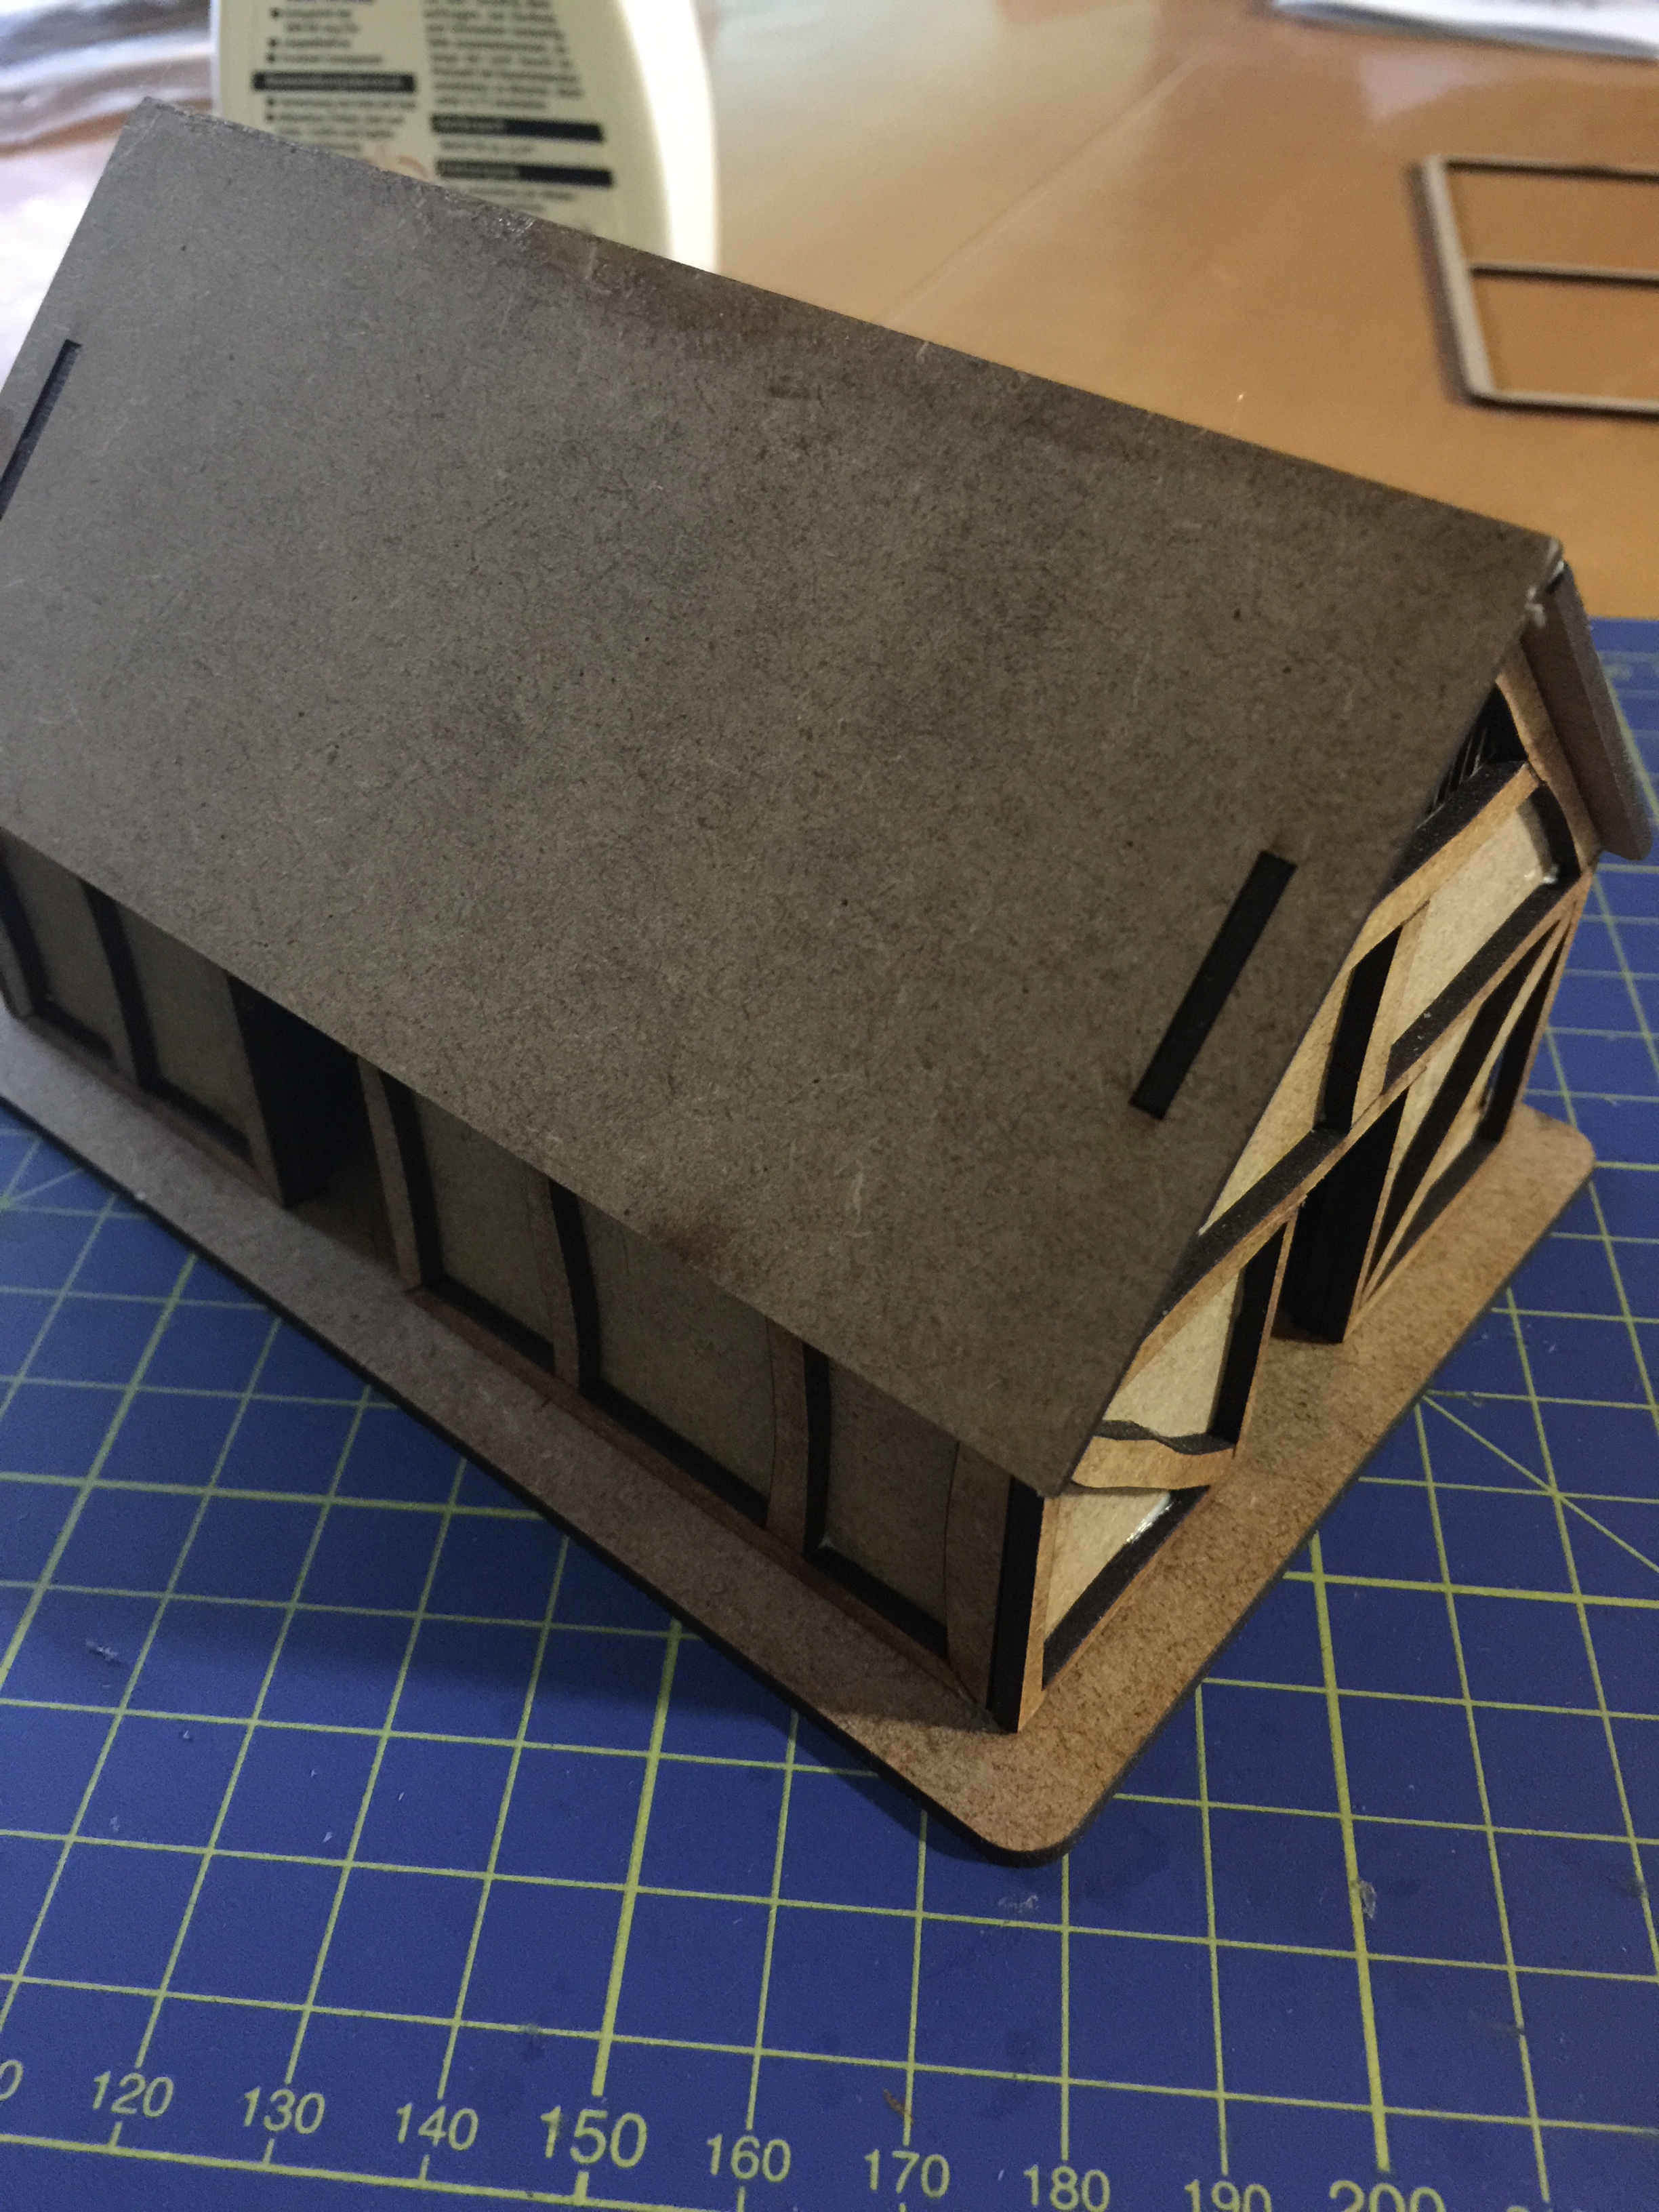

as you can see on theses pictures.
Then you have to glue the two roof sections . This is very easy to do because of the pegs in the side walls which keep the roof in place. But be careful not to get glue between the roof and the walls if you want to be able to lift the roof off later during your wargames. These pegs are nice for constructing the building but it is quite difficult to lift off the roof because of the tight fit!
The last step is to glue in the doors and attach the teddy bear fur. You can do that with ordinary white or wood glue.
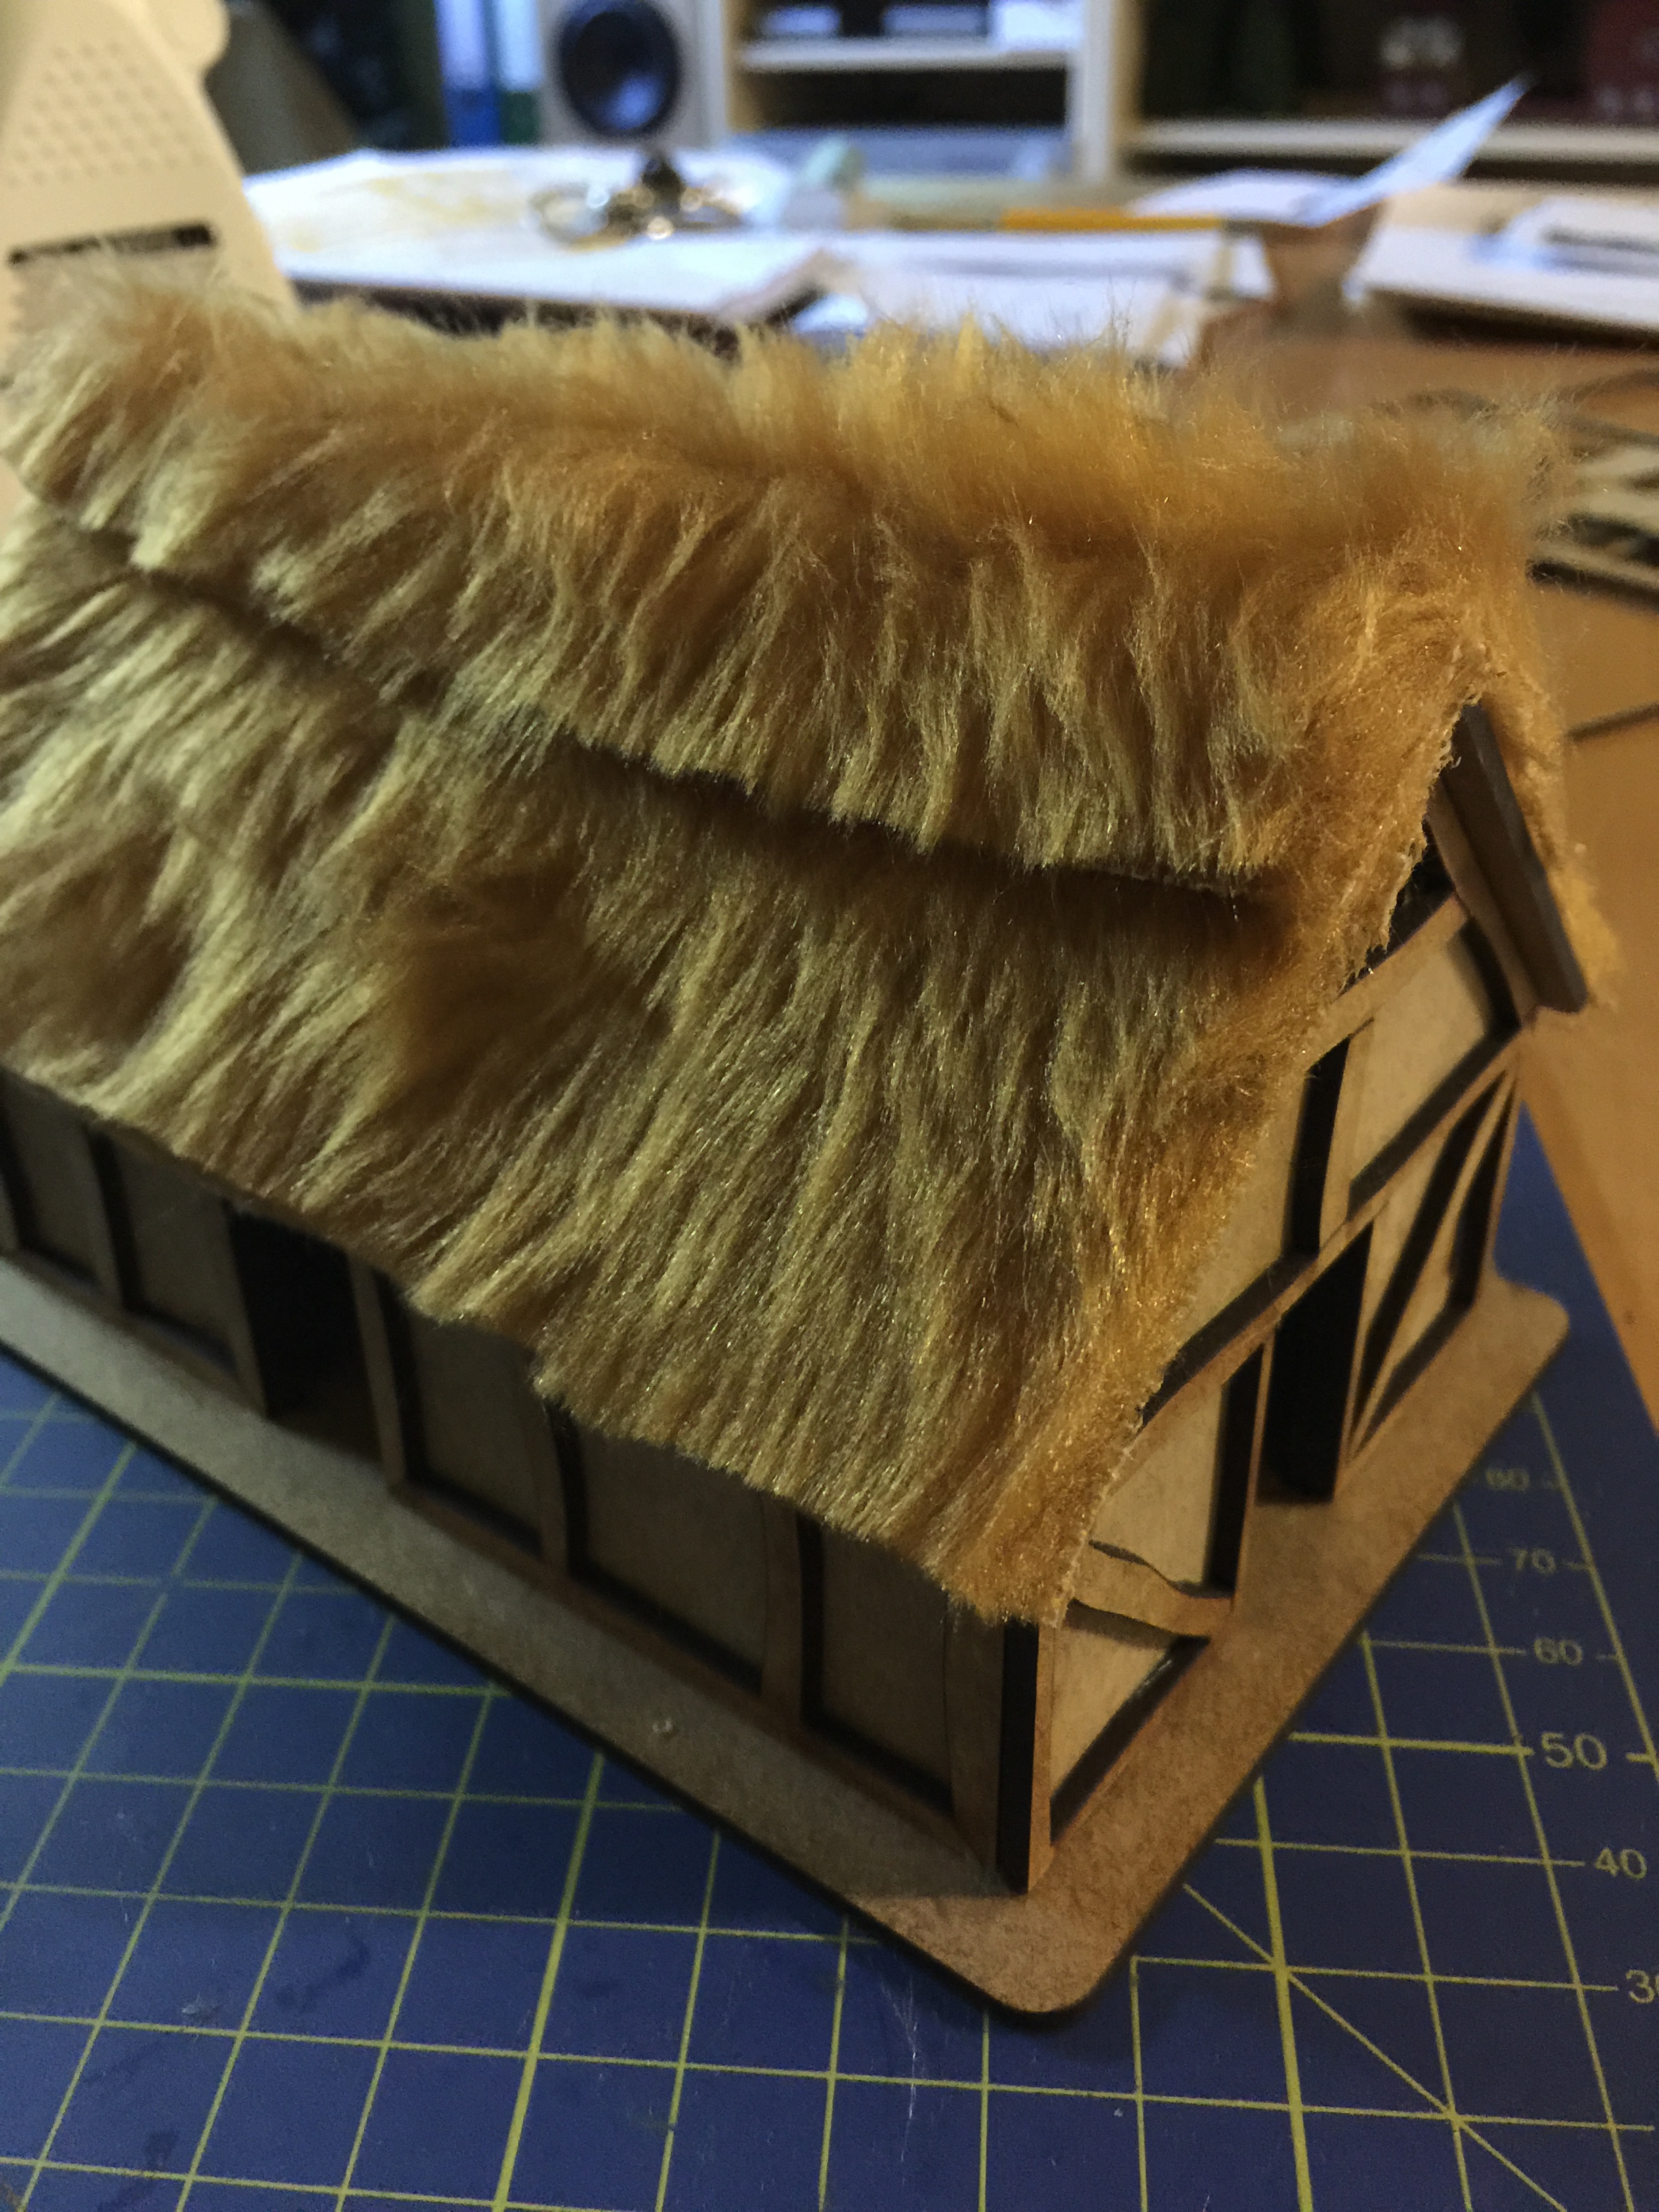
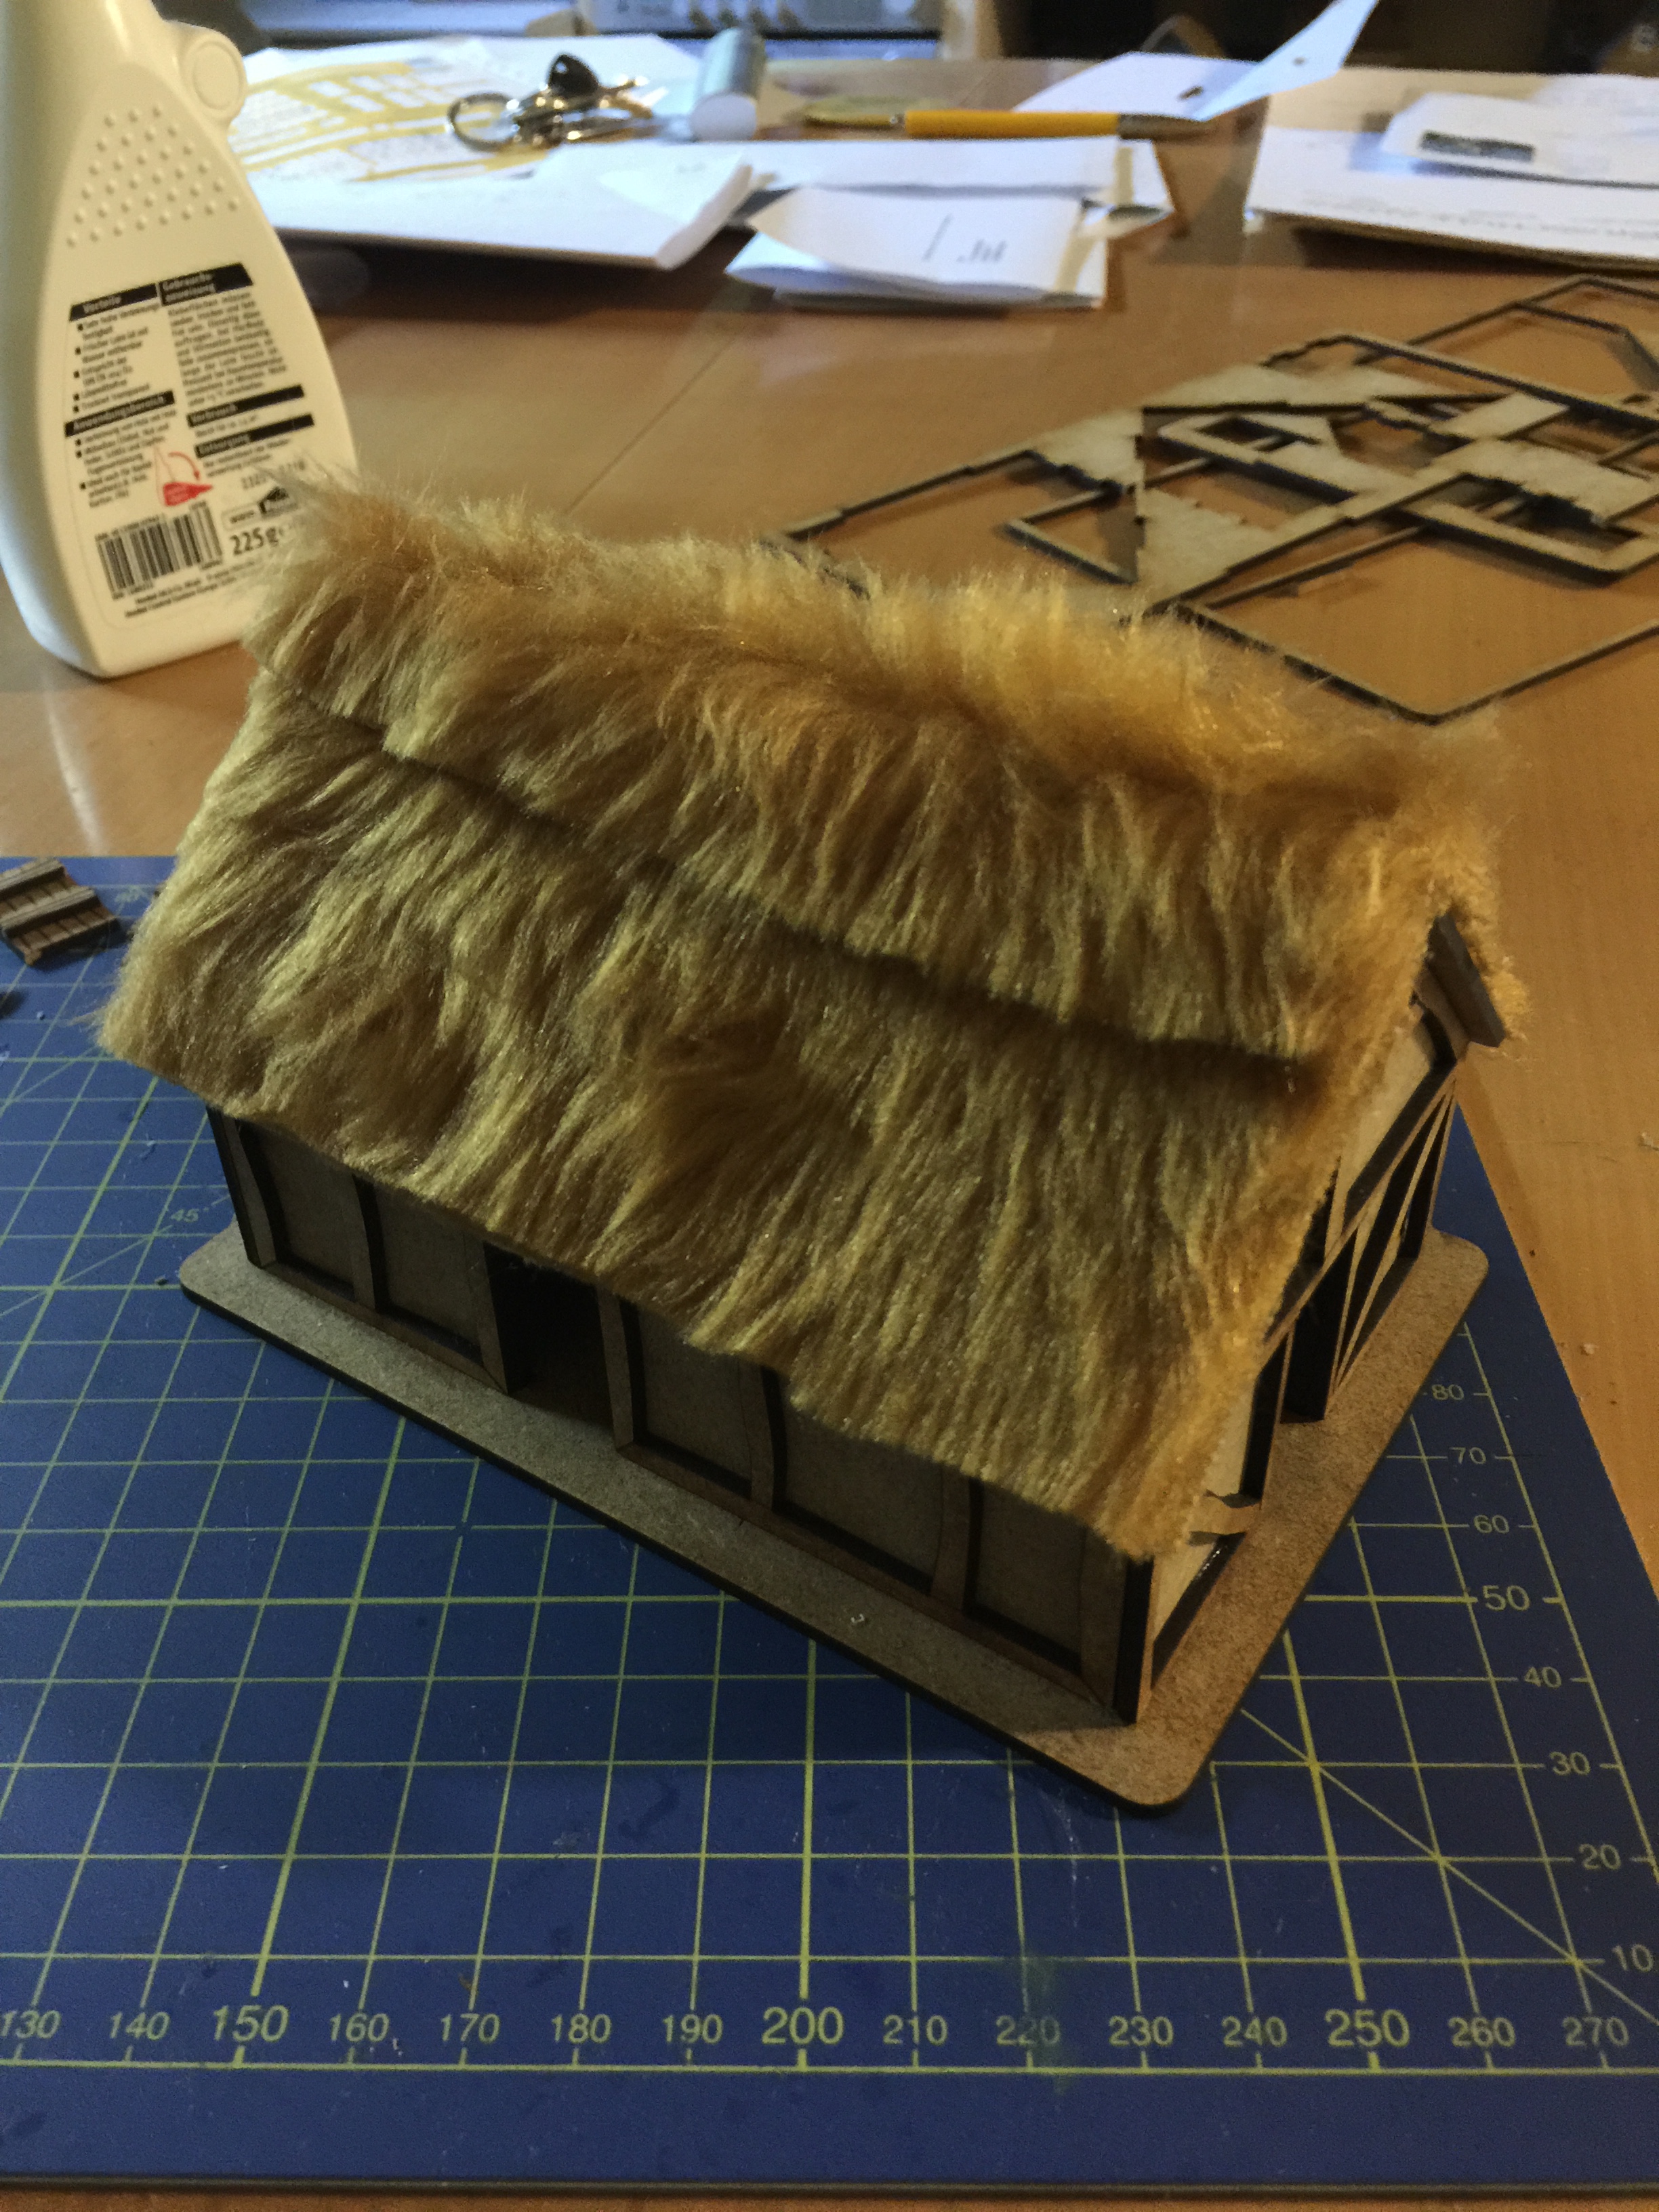
Timeline recomends to paint the teddy bear fur with a mix of white glue and water to get a more natural look just like real thatch
 Thats all for now. I will ad more pictures after painting the model.

[…] Terrain […]
LikeLike
[…] Terrain […]
LikeLike
Excellent tutorial. Easy to follow and good results. I am thinking of making my first steps into casting as well. So far I only did press molds, but silicon is more versatile. What do you use for the casting?
LikeLike
[…] Terrain […]
LikeLike
[…] Terrain […]
LikeLike
[…] Terrain […]
LikeLike
[…] Terrain […]
LikeLike
[…] Terrain […]
LikeLike
Amazing work. Highly motivational!
Cheers,
JB
LikeLike
Thank you!
LikeLike