
Next NVA soldier. This time in a unusual colored uniform. But it is a authentic color . You can look it up in this book:


More to come.
Next NVA soldier. This time in a unusual colored uniform. But it is a authentic color . You can look it up in this book:
More to come.

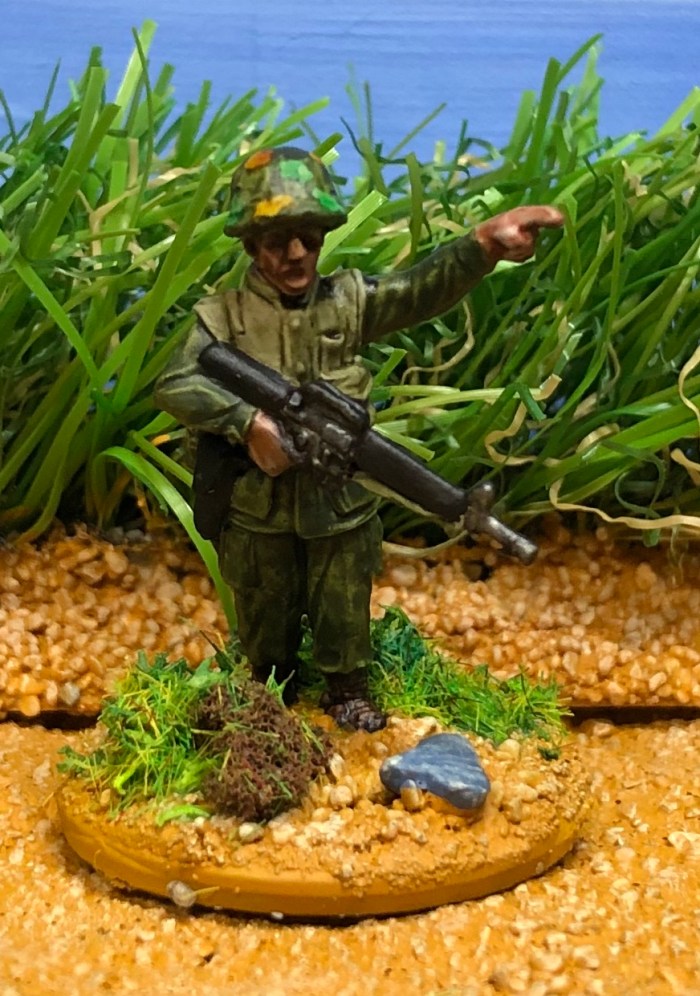
As it is beginning to get boring only to paint NVA, I still have a lot to do, I sprinkle in the occasional US Marine. So today a Marine with a “pig” (M60).


For my Vietnam war collection I needed some Sampans. I printed these in 3D and painted them up. Now my river doesn’t look so empty anymore.
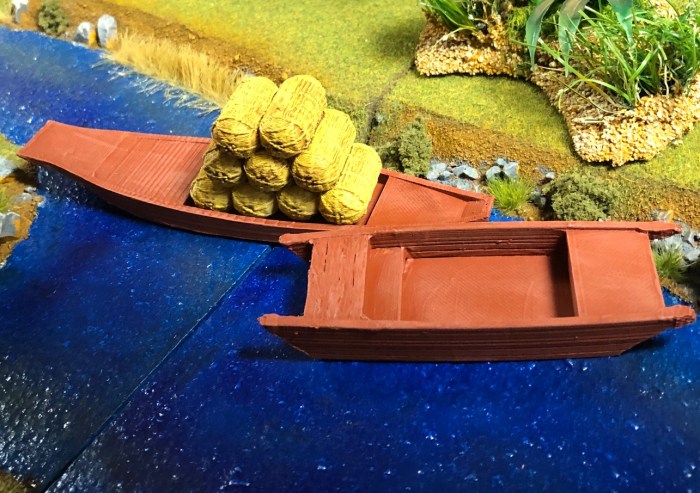


I am working on a bigger river setup for the US riverine craft which will be added to my collection eventually. more on that project later.

Here is the next NVA soldier . The first figure of the miniatures I bought at Crisis 19 in Antwerp. He is another Empress miniature. I painted him wearing a black pair of trousers ( you need new ones after a while on the Ho Chi Min trail) and a traditional blue and white Vietnamese scarf.


I got some plastic Bamboo from China. Bought it through e bay quite cheap. Don’t fear I bought it before the onset of COVID 19. So no space on an aircraft was waisted which could have been used for facemasks.
I quite like it but is it to tall? Should I have it halved in hight?


of course a Prick 25 operator. This is a Empress miniatures US Marine figure sculpted by Paul Hicks. He is carrying a PRC 25, aVHF transceiver, on his back. I made the antenna out of a plastic broom “hair” as I am clumsy and fear to brake the included metal one when gaming.

Here you see the PRC 25 with5 smoke grenades fixed to it. you can see that the metal frame , the PRC is affixed to goes down to the hip. Beneath the PRC is a role up rain poncho .


As always a treat to paint him.
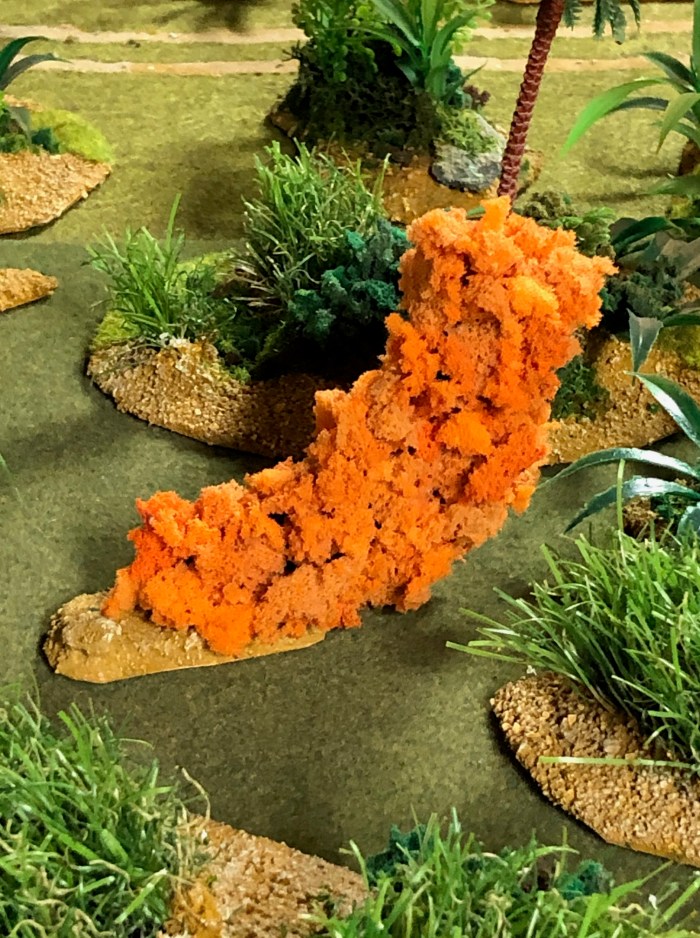
When you read about the Vietnam war or watch documentaries or movies about the conflict, you see or read about colored smoke for designating LZ or friendly lines to allow fast movers or gunships to work the enemy position. I wanted to have a marker like this for my games. Just to show that a FO ordered aircraft support.
I build a base and a skeleton out of plastic card like you can see here:


Then I painted the base like I paint all my terrain and painted the skeleton black. Sorry no pictures. After that i started gluing flocking material onto the skeleton with white glue or wood glue. You get something like this then:

At the left hand bottom corner of the picture you see the little smoke grenade which produces the smoke. Little plastic rod painted accordingly . I produce my flocking material by myself to safe some money and get different colors. To see how I do this go here.
Here are some more pictures:


And on the gaming table:
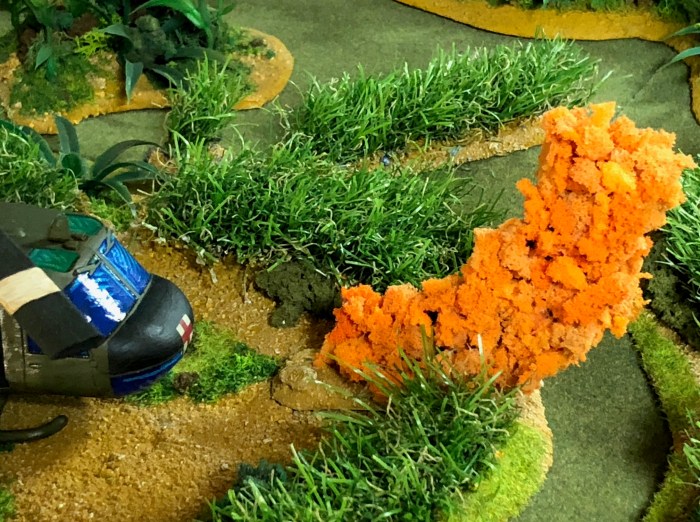
I think it works quite well. No to do some different colored ones.

Here is the last NVA soldier of the lot i bought at the release date last year. Empress Miniatures NVA soldier , sculpted by Mr. Hicks.


And the last three together:


Next up ” throw smoke!”.


Today I will show you how I paint my US Marines with, mainly, GW Contrast colors. As I have to stay at home this week , because of Corona, I had the time to take a picture after each step.
Step 1:


A base coat of Sky grey.
Step2:


Paint the trousers, shirt helmet cover and all bags water bottles etc Militarium green. This was thinned like all the contrast colors 50/50 with contrast medium. The trousers and shirt and helmet cover got to layers the rest only on. As you can see that gives a subtle different shade.
Step 3:


To paint the flack jacket I use a mixture of 5 drops Sepia shade + 1 drop of Creed camo.
Step 4:


Re base coat everything not jet painted and base coat the camo spots on the helmet cover in Sky Grey.
Step 5:


Paint the boots in Cigar brown.
Step 6:


Paint ca 50% of the camo spots on the Helmet cover with Nazdreg yellow, this time without thinning.
Step 7:


Paint the rest of the spots in Warp lightning again without thinning.
Step 8:


Paint the metal parts of the M16 in Silver.
Step 9:


Paint the plastic parts of the gun in Black.
Step 9:


Here I used paints from the Instar Alpha range . They can be used like the Contrast paints by GW but they are cheaper and give the same effect! Thinned down with their medium , called Water+, 50/50. Paint over the metal parts of the gun.
Step 10:


I painted the base in the color I use for my terrain building.
Step 11:


Paint the stones in grey.
Step 12:


Drybrush the base with Sand.
Now the figure gets a coat of matt varnish , I do this with my airbrush. Afterwards flocking and voila you get this:


I hope you liked my run trough my painting technique !

Another NVA regular . Figure by Empress miniatures.


Just one more and the first lot is finished.
