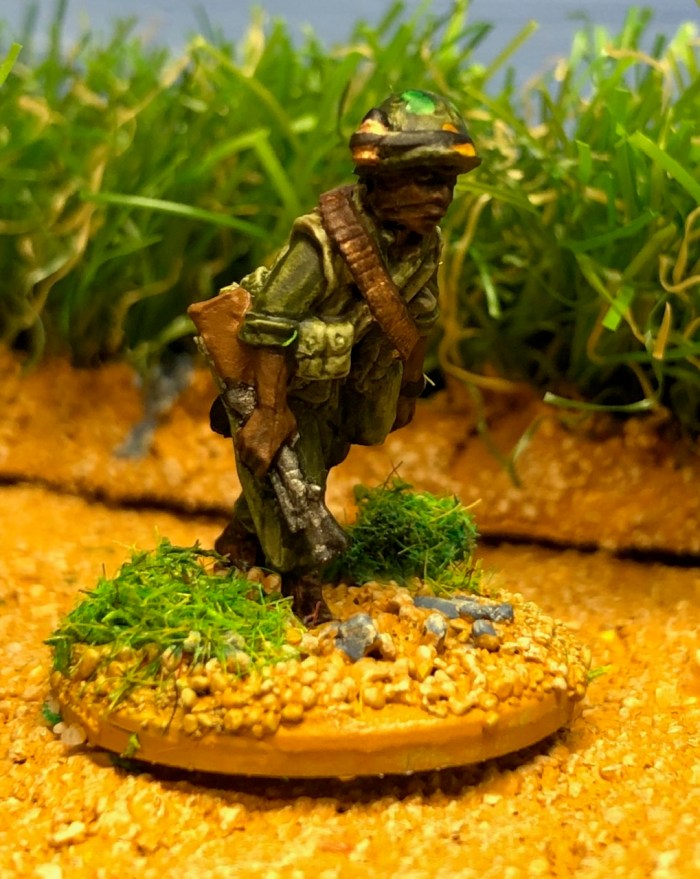
Good Morning. So the Salute weekend is gone by without Salute… more time for painting though. I painted up this blooper gunner from Empress. Very nice sculpt by Paul Hicks.
It was a joy to paint.


More to come…
Good Morning. So the Salute weekend is gone by without Salute… more time for painting though. I painted up this blooper gunner from Empress. Very nice sculpt by Paul Hicks.
It was a joy to paint.
More to come…

Next NVA soldier. This time in a unusual colored uniform. But it is a authentic color . You can look it up in this book:


More to come.

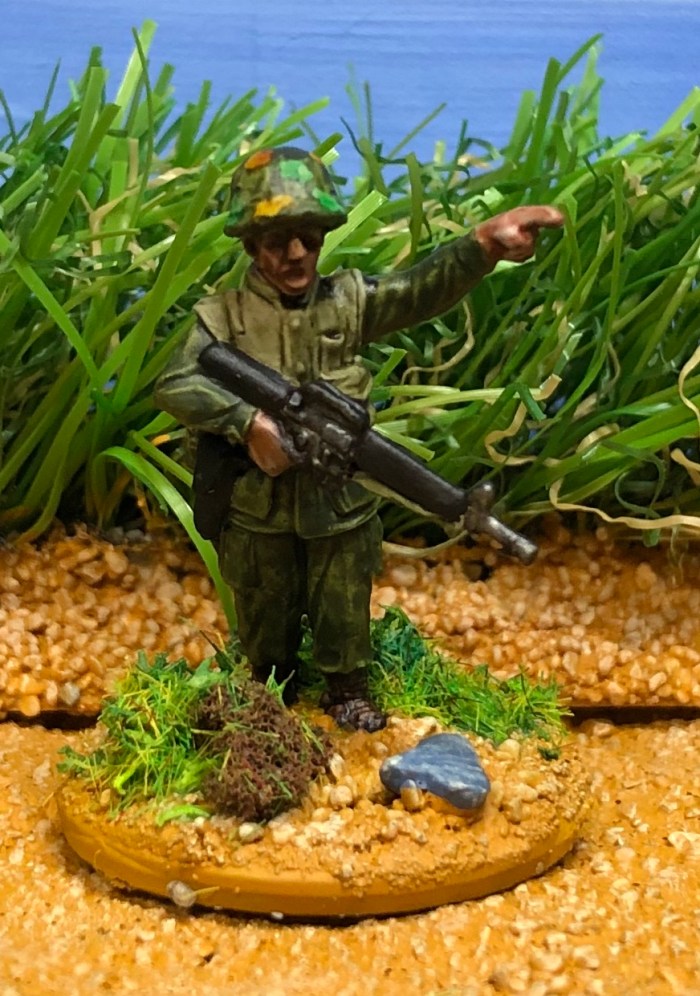
As it is beginning to get boring only to paint NVA, I still have a lot to do, I sprinkle in the occasional US Marine. So today a Marine with a “pig” (M60).


Here is the next NVA soldier . The first figure of the miniatures I bought at Crisis 19 in Antwerp. He is another Empress miniature. I painted him wearing a black pair of trousers ( you need new ones after a while on the Ho Chi Min trail) and a traditional blue and white Vietnamese scarf.


of course a Prick 25 operator. This is a Empress miniatures US Marine figure sculpted by Paul Hicks. He is carrying a PRC 25, aVHF transceiver, on his back. I made the antenna out of a plastic broom “hair” as I am clumsy and fear to brake the included metal one when gaming.

Here you see the PRC 25 with5 smoke grenades fixed to it. you can see that the metal frame , the PRC is affixed to goes down to the hip. Beneath the PRC is a role up rain poncho .


As always a treat to paint him.

Here is the last NVA soldier of the lot i bought at the release date last year. Empress Miniatures NVA soldier , sculpted by Mr. Hicks.


And the last three together:


Next up ” throw smoke!”.


Today I will show you how I paint my US Marines with, mainly, GW Contrast colors. As I have to stay at home this week , because of Corona, I had the time to take a picture after each step.
Step 1:


A base coat of Sky grey.
Step2:


Paint the trousers, shirt helmet cover and all bags water bottles etc Militarium green. This was thinned like all the contrast colors 50/50 with contrast medium. The trousers and shirt and helmet cover got to layers the rest only on. As you can see that gives a subtle different shade.
Step 3:


To paint the flack jacket I use a mixture of 5 drops Sepia shade + 1 drop of Creed camo.
Step 4:


Re base coat everything not jet painted and base coat the camo spots on the helmet cover in Sky Grey.
Step 5:


Paint the boots in Cigar brown.
Step 6:


Paint ca 50% of the camo spots on the Helmet cover with Nazdreg yellow, this time without thinning.
Step 7:


Paint the rest of the spots in Warp lightning again without thinning.
Step 8:


Paint the metal parts of the M16 in Silver.
Step 9:


Paint the plastic parts of the gun in Black.
Step 9:


Here I used paints from the Instar Alpha range . They can be used like the Contrast paints by GW but they are cheaper and give the same effect! Thinned down with their medium , called Water+, 50/50. Paint over the metal parts of the gun.
Step 10:


I painted the base in the color I use for my terrain building.
Step 11:


Paint the stones in grey.
Step 12:


Drybrush the base with Sand.
Now the figure gets a coat of matt varnish , I do this with my airbrush. Afterwards flocking and voila you get this:


I hope you liked my run trough my painting technique !

Another NVA regular . Figure by Empress miniatures.


Just one more and the first lot is finished.
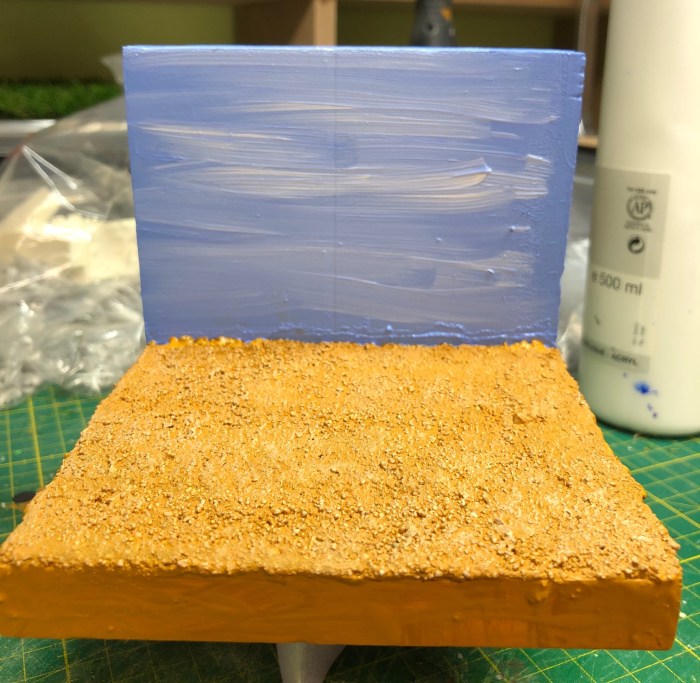
Now that there are only three older NVA soldiers left before I start on the Crisis19 ones, I thought it would be a good idea to change my photo setup. Until now i took the pictures on my gaming table . The lighting wasn’t perfect there so I decided to make a small framework for my painting/modeling desk as light there is no problem. So I took two pieces of extruded polystyrene and glued them together with my hot glue gun.

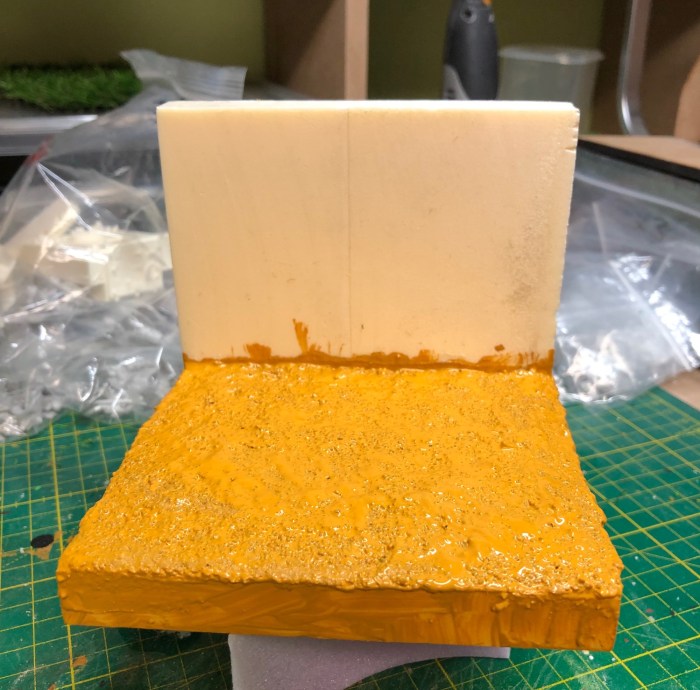
You get something like this then. I glued sand and grid down like I would do on a piece for my gaming table and started painting it with my usual ground colors.
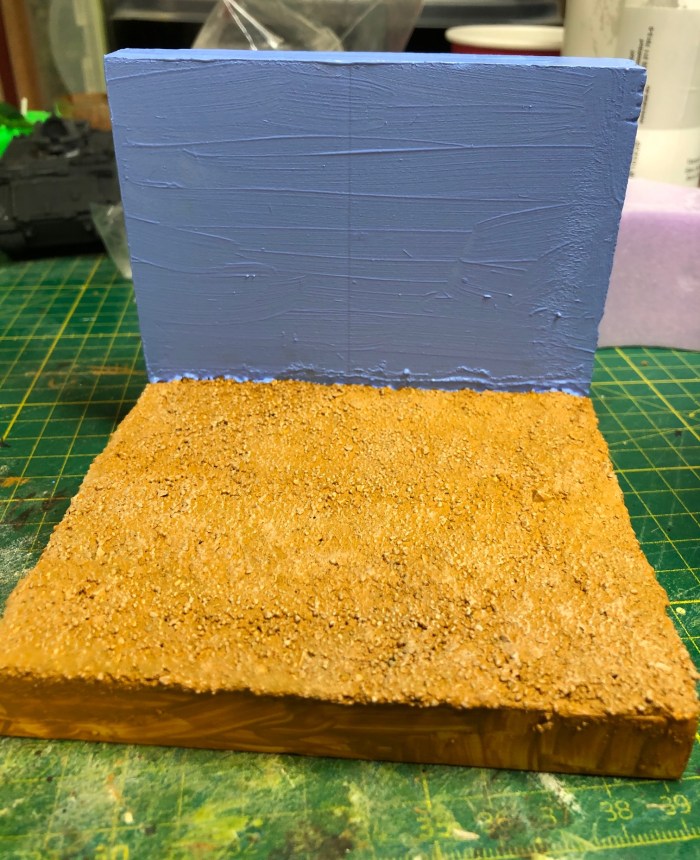
Then I painted the backdrop a light blue color and used a second even lighter tone of blue to simulate light clouds.
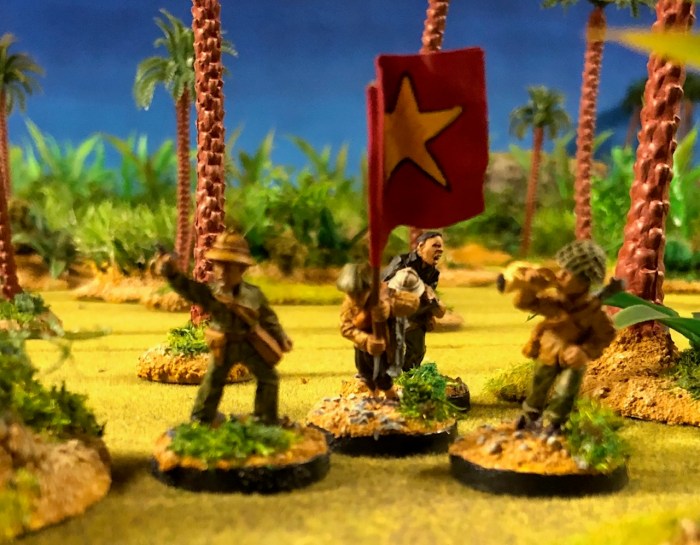
So when used correctly you get a picture like this:

Now you can use different scatter terrain pieces to change the layout as you like. Here are pictures of another NVA soldier using the plain photo frame I described above:


I think you get much better pictures like that . What do you think?

The platoon leader. The last figure from the command pack , to be found in the indo china range by empress miniatures.


And the complete platoon leader section:


Next will be the last 3 NVA soldiers from the first badge of Vietnam war figures I purchased. After that i will start on the miniatures I bought at Crisis 19.
