So now after the hype of the Tactica in Hamburg it is back to normal in my mancave in the basement.
Here is the third Lannister bowman for my Dragon Rampant Lannister army.


More to come in the next days.
So now after the hype of the Tactica in Hamburg it is back to normal in my mancave in the basement.
Here is the third Lannister bowman for my Dragon Rampant Lannister army.
More to come in the next days.
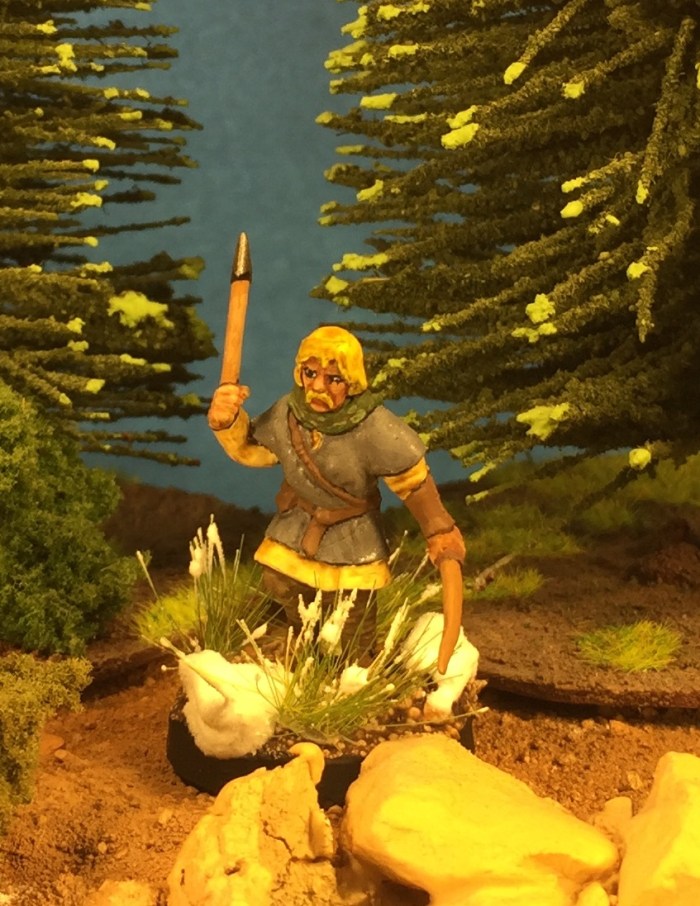
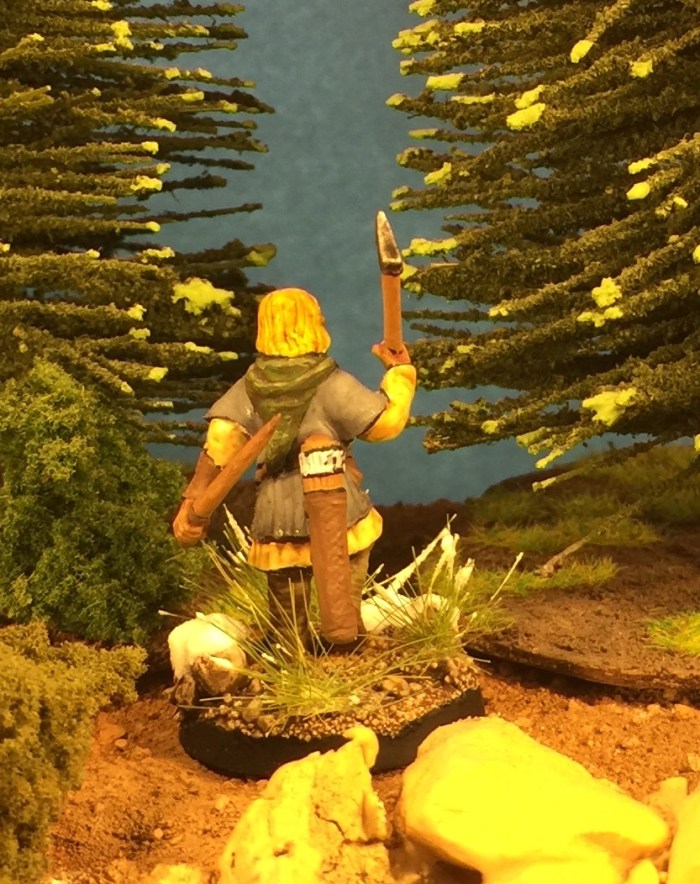
Here is the third Stark bowman. he is a strait build from the conquest plastic box. The only thing I added was a fur cape from greenstuff.


Next is another Lannister archer.
Here is the second Lannister bowman. He is a strait build from Perry plastic WotR parts. No greenstuff added.


Next will be another Stark figure. I have to finish these quite quickly as I want to start on the Westfalia halfmen right away when they reach me.
Here is the next Stark bowman:


This weekend I started doing some trees and shrubs for my tabletop terrain.
What you need to build the trees and shrubs is some big enough nails, metal wool ( for sanding / use the finest you can get), cheap oregano ( it doesn’t have to taste good !) at least 500 g for 10 trees and ten shrubs, a hot glue gun, an airbrush or a black and a green spray can, spray glue, paper beer mats and a well ventilated workspace.
So now what I did with all this. First I cut out oval or round discs out of the paper beer mats. These will be the bases of the trees/shrub. Then I took a nail and glued it with the hot glue gun to the beer mat like so:

Then I cut of a piece of the metal wool ( use a pair of old scissors for this as they won’t be sharp afterwards) and shaped it into a tree form. Thereafter put some hot glue on the top of the nail and slip the metal wool over the nail. Be careful not to burn your fingers.
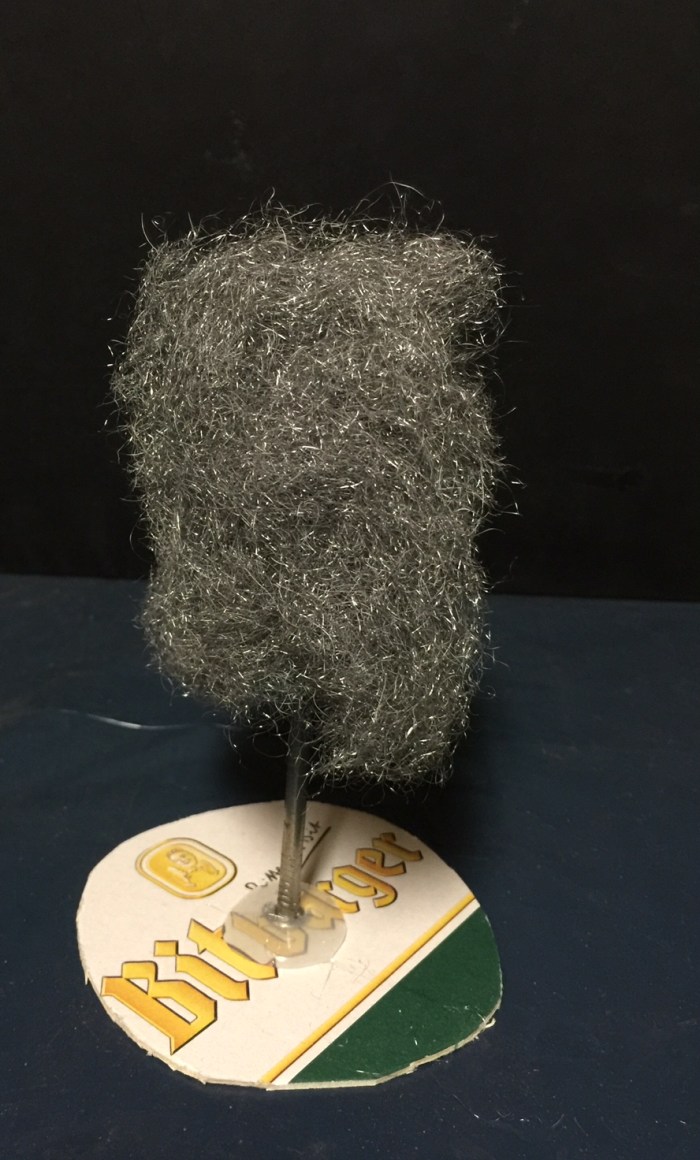
The shrubs were made by hot gluing the metal wool directly to the beer mat.

You could use different sizes of nails to do different trees I only had one size of nails at hand.
The next step is spraying the whole tree/shrub black. I used an airbrush you can use a spray can of course anyway be sure to have a well ventilated area to work in. Next you spray the tree/shrub with spray glue (wait for the black paint to dry first) and put a generous amount of oregano over the tree/shrub. Leave that to dry over night and buy yourself a pizza because you will be very hungry when the house smells of oregano 🙂
Once dry shake of the oregano excess and spray the tree in green color. Let that dry and give the beer mat a good covering of fine and coarse sand like you do with the rest of the scenery you have . You should have something like this then:

In this picture the sand on the base is still missing. I will post more pictures when the trees are finished.
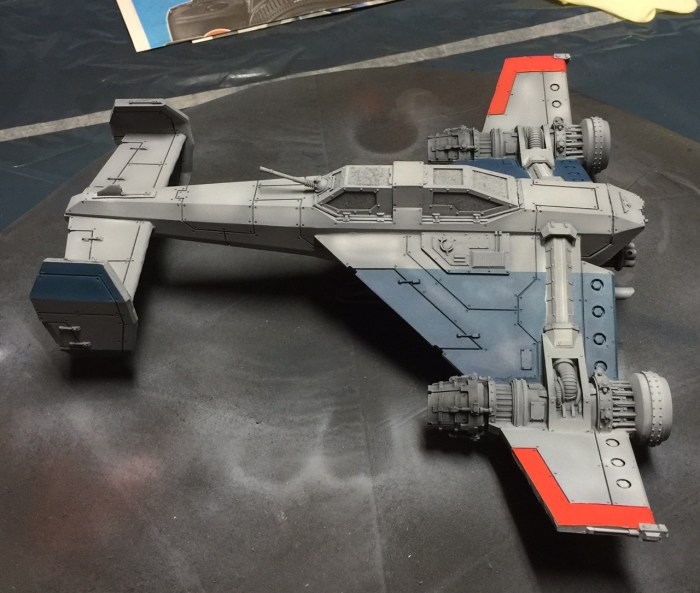
The Avenger Strike Fighter is completed. Here are the pictures of the model. I will right up a complete article with all the steps from the beginning to completion of the Avenger on the Airbrush painting page. So here are the pictures:
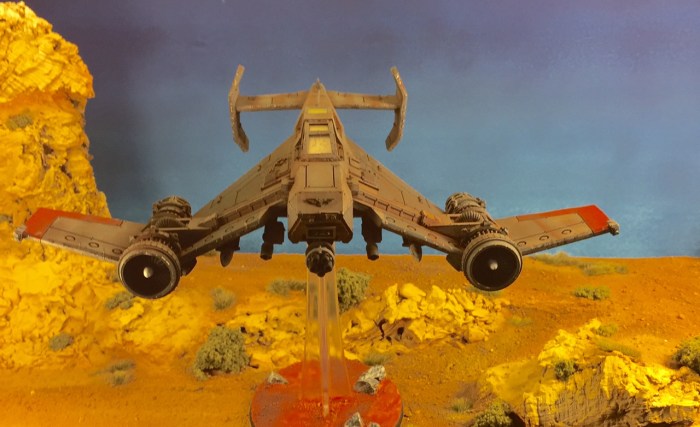


If you like what you see feel free to leave a comment!
I didn’t like to paint always the same colors on 12 figures in a row. Therefore I started two units a Stark and a Lannister one so that I can switch between them.
So here is the first Lannister Bowman. A strait build out of a few Perry plastic WotR boxes:


The long Grass Tufts were made with my flock box again
When I was at Crisis in Antwerp in November I got one of the new boxes of plastic bowmen by Conquest games.

The figures are quite nice but it is very difficult to build them in a way that they look like shooting an arrow correctly. Normally the arrow arm is lifted up to the ear when you draw a bow ( I am an sports archer myself) but this is not really achievable with these minis. Anyway I gave them a try and started to build and paint a 12 men bow unit for my Stark Army ( for Dragon Rampant).
Here is the first bowman:


This is a strait build from the box except the hood which was added with some greenstuff. The grass tufts were made with the flock box I got for xmas. You can see a review on the terrain page.
More during the next days.
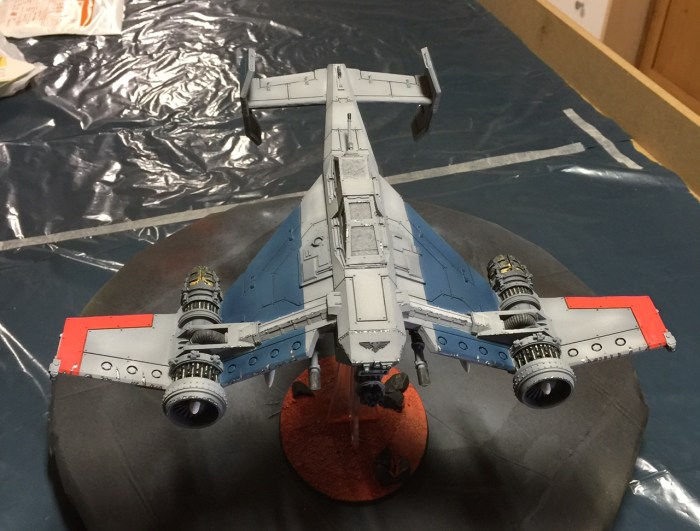
Here are Pictures of the upper side of the Avenger Strike Fighter. My son wanted the model to appear very used and dirty. So I had to use quite a lot of pigments to achieve this look. As the army is based on a red planet like Mars the dirt had to be red in tone . Here is what it looks like now after pigments and several coats of varnish as fixative for the pigments as it is, after all, a gaming model:


Next will be the bottom of the plane and the windows of the cockpit then it is finished. Fell free to leave a comment if you like.
The first thing I did was to remove all the masking tape and newspaper. This is always a very exciting step as you see the color combination you chose for the first time. Look for yourself:


The next steps are done with a brush again. I blocked in all the other colors like on the Lenses:


The engines:


The armament:


Then I started the aging and weathering step by painting in Scratches . This step isn’t finished yet as the number I on the fuselage is still missing (remember this Avenger is red I).


This is what it look like at the moment. A lot more to do before it is finished! Watch this space for coming updates!