The build is complete

Here are the pictures of the last additions to my Thunderhawk gunship. The only thing missing is the hard points for the hell strike missiles.

IMG_8942

Next Step will be a coat of PVA mixt with black paint to make it more resilient against damage . The black paint is added to be able to see that the PVA was brushed on the complete model , it also makes it easier when I start to add rivets and screws to the model as these are made from magic sculpt , which is white when dry. So I can see more easily where I mist some.


Progress on my Space Marine gunship

I did some more work on my Thunderhawk gunship over the last weeks .

I did some more work on the underside of the fuselage and the main wings and engines.

I added the attack wings  which are magnetized to make them movable. Here is a short video about the attack wings moving:

Here are a few pictures of the gunship. The weapons and landing gear are still missing.

Here is the Landinggear:

And here is what it looks like at the moment:

IMG_8905

The 4 twin heavy bolsters at the nose of the fuselage and under the main wings as well as the hell strike missiles are still missing. When these are added a first basecoat of a mixture of PVA and paint will be applied to harden the polystyrene. Then I will add rivets and screws and then painting will start. So a lot more work to do but I think most of the work has been done.

First test on my gaming table

Yesterday I did the first test with my Thunderhawk on my gaming table. I test fitted the main wings, which are not completed yet. Furthermore I build a flying base from extruded polystyrene. The gunship is fitted to the stand with magnets so that different stands can be used too. When the gunship is finished it will also have retractable landing gear , which at the moment isn’t fitted yet.

FullSizeRender 31

Progress on the Thunderhawk gunship

Over the last week and the last weekend I did a bit more on my Thunderhawk gunship for my Galactic Knights Space Marine Chapter:

Above you see some more work done to the foreword section of the main hull.

The cockpit area is done. Now follows the addition of the foreword wings:

And the detailing of the aft hull and the main engine of the main hull:

When the last details are added to the left side of the main hull the next step will be detailing the main wings with the other two engines. Then the attack wings and the rest of the armament have to be done. After that adding all the rivets and other small detail. So watch this space for more updates.

A Thunderhawk gunship for the Galactic Knights Chapter

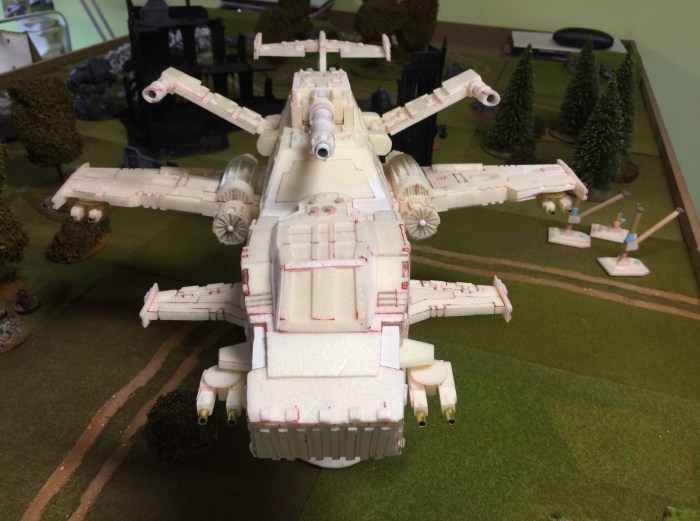
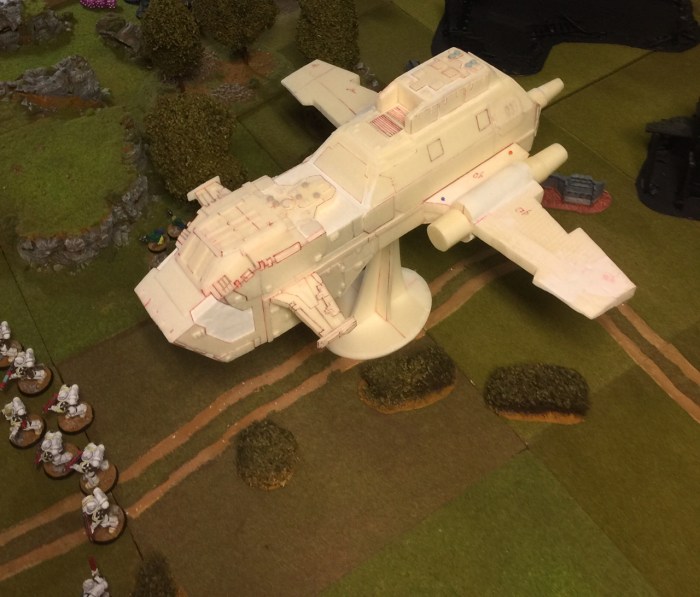
As I have quite a few Primaris Space Marines in my army and you can only use the new repulsortank as transport I thought about getting a Thunderhawk gunship as a transport as it is the only other vehicle you can use in Warhammer 40K to get your Primaris Marines transported.

I always wanted to have one in my collection. Way back in the 1990’s I considered one too for my Space Wulf army I used to have. But the price tack at Forgeworld was just to high then and it is still today. There is no way paying 450 British pounds for a single model! So how to get on of these:

pict

There is a Facebook group called papercraft poorhammer modelling were you can get templates to build your own paper models from. As paper is, as far as I think, not sturdy enough for gaming I used the templates to build my own Thunderhawk from extruded polystyrene . I have a proxxon foam cutter which is used for architectural models and which I have used for terrain building till now. I have a few mdf additions for this machine for cutting angles and round objects from Gerard Boom. You will find him at Crisis for example.

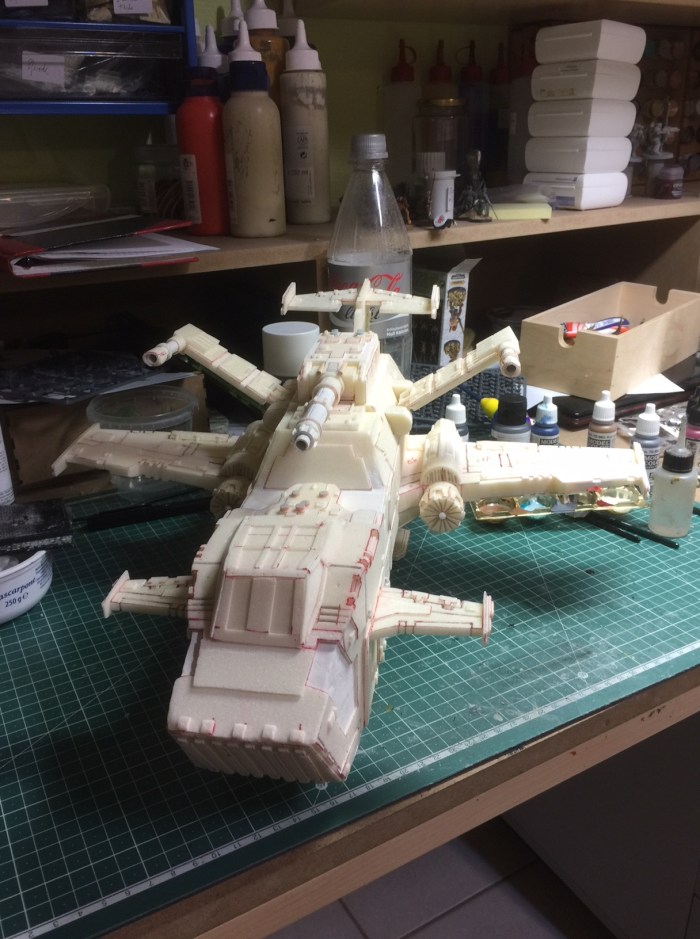
So here is the beginning of my own Thunderhawk :

This is the main body as a basic shape.

IMG_7988

Here you see the basic wing assembly.

This are the styrodur ( extruded polystyrene )parts for the engines. On the right picture is the mdf part which helps to cut out round shapes.

Here the engines are added to the wings . All basic shapes . Fillerwork and sanding has to take place yet.

FullSizeRender 7

And this is how far I got this weekend. From start to this stage it took about 10 hours building time. Most time was used to find out how to use the templates to build with extruded polystyrene . The detail work will start in the next days. So watch this space for an update.

What I forgot to tell you , the version of the Thunderhawk I am building is no longer available at Forgeworld, they have a new slightly different Thunderhawk model now for sale.